

Getting charcoal ready for grilling takes the right amount of time to ensure your food cooks properly. Many people make the mistake of starting to cook too early or waiting too long, which affects both heat quality and food flavor.
You should let charcoal burn for 15-20 minutes for lump charcoal and 20-30 minutes for briquettes before you start grilling.
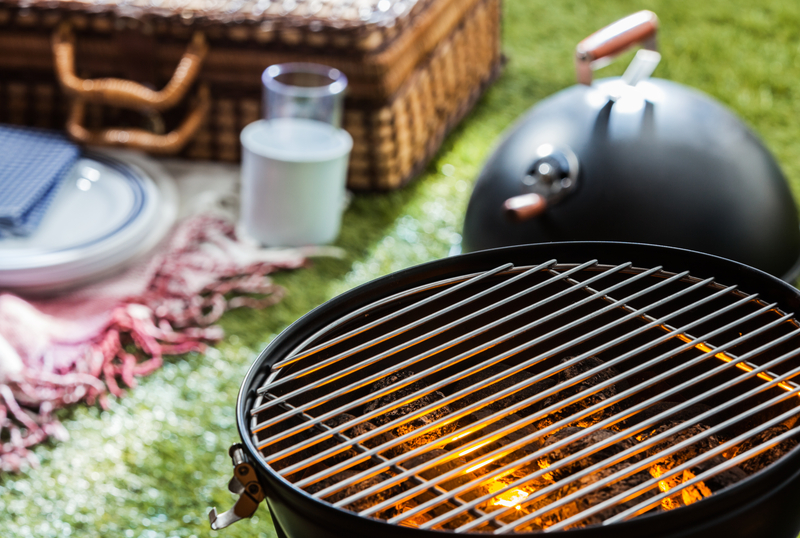
The coals are ready when they’re covered with white-gray ash and glowing red underneath. This timing allows the charcoal to reach stable temperatures and burn off any chemicals that could affect taste.
This guide walks you through the burn process, from understanding why timing matters to managing temperatures throughout your grilling session. You’ll learn how different charcoal types behave, proper lighting techniques, and ways to extend your charcoal’s life for future use.
Why Timing Charcoal Burn Before Grilling Matters
 Proper charcoal burn timing directly affects food quality, heat consistency, and safety. The difference between waiting 15 minutes versus 30 minutes changes how your food cooks and tastes.
Impact on Flavor and Texture
Underburned charcoal releases harsh smoke that adds bitter, acrid flavors to your food. When you start cooking before coals develop their white-gray ash coating, volatile compounds from incomplete combustion penetrate the meat surface.
Flames from freshly lit charcoal char the exterior while leaving the interior undercooked. This prevents you from achieving the perfect char with a properly cooked center.
Properly burned charcoal produces clean heat with minimal smoke. The ash-covered coals burn at 400-500°F, creating ideal conditions for developing flavor through the Maillard reaction. Your meat develops that desired crust without chemical-tasting residue from lighter fluid or raw wood compounds.
Briquettes require 20-30 minutes to burn off binders and additives completely. Lump charcoal needs 15-20 minutes to stabilize its heat output. Cooking during these windows ensures better texture control across different cuts.
Ensuring Even Heat Distribution
Unevenly burned charcoal creates hot and cold zones that weren’t planned for. Some coals burn at 600°F while others sit at 300°F, making it impossible to control cooking times accurately.
The ash coating on fully burned charcoal indicates thermal equilibrium across your fuel bed. This consistent temperature lets you predict how quickly food will cook and where to position different items on your grate.
Charcoal grilling requires stable heat zones for proper technique. Direct grilling needs uniform high heat, while indirect methods depend on predictable temperature differences. Both fail when coals haven’t reached proper burn stage.
Temperature fluctuations from premature cooking cause uneven browning and inconsistent doneness. A steak might have one side perfectly medium-rare while the other remains rare or becomes overdone.
Food Safety Considerations
Cooking over active flames or incompletely burned charcoal increases your risk of undercooked food. The irregular heat makes it difficult to reach safe internal temperatures, particularly for poultry and pork.
Flare-ups from excess lighter fluid or fresh charcoal create dangerous situations. These sudden flame bursts can burn you or ignite grease drippings, causing larger fires.
Properly timed charcoal burning reduces harmful smoke exposure. Fresh coals produce higher levels of polycyclic aromatic hydrocarbons (PAHs), which settle on food surfaces when you cook too early.
Waiting the full 15-30 minutes allows temperatures to stabilize in safe ranges. You can then monitor and maintain proper cooking zones without unexpected heat spikes that char food exteriors while leaving interiors at unsafe temperatures.
How Long Should Charcoal Burn Before Grilling?
 Charcoal should burn for 15-25 minutes before you start grilling, though the exact time depends on your charcoal type and cooking method. You’ll know the charcoal is ready when it develops a consistent gray ash coating and stops producing thick white smoke.
Recommended Burn Times for Different Charcoal Types
Lump charcoal burns faster than briquettes and typically needs 10-15 minutes to reach cooking temperature. This natural hardwood charcoal lights quickly and produces high heat, making it ideal for searing steaks and burgers.
Charcoal briquettes require 20-25 minutes to achieve optimal burning conditions. Their compressed, uniform shape provides more consistent heat but takes longer to ash over completely.
With a chimney starter, you can reduce these times slightly. Lump charcoal becomes ready in 8-12 minutes, while briquettes need 15-20 minutes. Without a chimney starter, add 5-10 minutes to these estimates.
Your cooking temperature also affects burn time:
- High heat grilling (450-550°F): 10-15 minutes
- Medium heat cooking (350-450°F): 15-20 minutes
- Low and slow smoking (250-350°F): 25-30 minutes
Key Visual and Physical Readiness Cues
Look for a white-gray ash layer covering 80-90% of the charcoal surface. The coals should glow orange-red underneath this ash coating. Black charcoal or heavy white smoke means the coals need more time.
The smoke changes as charcoal burns. Early thick white smoke contains bitter compounds that affect food flavor. Wait until you see thin, nearly invisible smoke before cooking.
Test heat levels by holding your hand 5 inches above the grate:
- 2-4 seconds before pulling away = High heat
- 5-7 seconds = Medium heat
- 8-10 seconds = Low heat
Your charcoal should produce even heat across the cooking area. Uneven glowing or dark spots indicate incomplete burning.
Step-By-Step Process from Lighting to Cooking
Step 1: Fill your chimney starter with the amount of charcoal needed for your cook. Light newspaper or fire starter cubes underneath.
Step 2: Wait 10-15 minutes for lump charcoal or 15-20 minutes for briquettes. Check for the gray ash coating and reduced smoke.
Step 3: Pour the hot coals into your grill. Arrange them for direct heat (spread evenly) or indirect heat (pushed to one side).
Step 4: Place the cooking grate on the grill and close the lid. Let it preheat for 3-5 minutes.
Step 5: Check the temperature using the hand test or a grill thermometer. Adjust vents to increase or decrease heat as needed.
Step 6: Oil your grates and begin cooking once you confirm the charcoal burning time has produced stable, even heat with minimal smoke.
Charcoal Types and Their Burn Characteristics
 Lump charcoal burns hotter and faster, typically lasting 1 to 1.5 hours, while charcoal briquettes provide more consistent heat for 3 to 3.5 hours. Your choice between these types of charcoal affects how long you should let them burn before grilling and how you manage heat during cooking.
Lump Charcoal: Performance and Uses
Lump charcoal consists of natural hardwood pieces burned into pure carbon without additives. This type lights in about 10 to 15 minutes and reaches higher temperatures than briquettes, making it ideal for searing steaks or cooking foods that need intense heat.
You’ll notice lump charcoal produces less ash during burning, which means better airflow in your grill. The irregular chunk sizes create varying burn rates, so you need to monitor temperature more closely. This charcoal type burns cleaner and imparts a more authentic wood-smoke flavor to your food.
The main drawback is shorter burn duration—you may need to add more charcoal during longer cooking sessions. You can reuse charcoal pieces that haven’t completely burned by saving the larger chunks after grilling. Store these pieces in a dry container and mix them with fresh lump charcoal for your next session.
Charcoal Briquettes: Consistency and Burn Duration
Charcoal briquettes are compressed blocks made from charcoal dust, coal, starch, and other binding agents. These uniform pieces provide steady, predictable heat that lasts 3 to 3.5 hours or longer. You should let briquettes burn for 20 to 30 minutes before cooking, waiting until they develop a light gray ash coating.
The compressed shape and additives help briquettes maintain consistent temperatures throughout your grilling session. This makes them particularly useful for slow-cooking ribs, brisket, or other foods requiring extended heat. You’ll use approximately 30 to 50 briquettes for a standard-sized grill.
Briquettes cost less than lump charcoal and are widely available at most stores. The trade-off is they produce more ash and may contain lighter fluid if you buy instant-light versions. Some additives can affect flavor, though most people don’t notice a difference with quality brands.
Comparing Charcoal Types for Grilling
The two main charcoal types serve different grilling needs based on burn characteristics and cooking goals. Understanding these differences helps you select the right fuel for specific foods.
| Feature | Lump Charcoal | Charcoal Briquettes |
|---|---|---|
| Burn time | 1-1.5 hours | 3-3.5 hours |
| Light time | 10-15 minutes | 20-30 minutes |
| Temperature | Hotter, less consistent | Moderate, very consistent |
| Ash production | Low | Moderate to high |
| Cost | Higher | Lower |
| Best for | Quick, high-heat grilling | Long, slow cooking |
Lump charcoal works best when you need maximum heat for short cooking times. Use it for burgers, kebabs, or thin cuts that cook quickly. Briquettes excel at maintaining steady temperatures for chicken, pork chops, or anything requiring 30 minutes or more on the grill.
You can’t effectively reuse charcoal briquettes because they break down into ash more completely than lump charcoal. Mix both charcoal types for balanced performance—use lump for initial high heat and add briquettes for sustained cooking.
Lighting Methods: Getting Your Charcoal Ready
 The method you choose to light charcoal affects burn time, safety, and flavor. A chimney starter typically gets coals ready in 10-15 minutes, while electric starters take 15-20 minutes, and lighter fluid speeds ignition but requires careful handling.
Using a Chimney Starter for Safe Ignition
A chimney starter is the most reliable tool for lighting charcoal. You fill the metal cylinder with charcoal, place crumpled newspaper or a fire starter cube underneath, and light it from below.
The design creates a draft that pulls flames up through the coals. Charcoal heats evenly without chemical additives or uneven burning.
Using a chimney starter takes 10-15 minutes for high-heat grilling and 15-20 minutes for medium heat. You’ll know the coals are ready when flames appear at the top and the charcoal develops a gray ash coating.
Key advantages:
- No lighter fluid needed
- Even heat distribution
- Safer than open flame methods
- Reusable and cost-effective
Hold the chimney by its heat-resistant handle and pour the hot coals into your grill when they’re fully ashed over.
Natural Fire Starters and Alternatives
Natural fire starters ignite charcoal without chemicals that can affect food flavor. These include wax-and-wood cubes, compressed wood fiber sticks, and fatwood pieces.
Place 1-2 fire starter cubes under your chimney starter or directly beneath a pyramid of charcoal. Light the cubes and wait for flames to spread to the charcoal above.
Alternatives include twisted newspaper, dry wood shavings, or cardboard egg cartons filled with charcoal. These options are environmentally friendly and readily available.
Natural fire starters add 3-5 minutes to total lighting time compared to lighter fluid. They produce minimal smoke and no chemical odors that could transfer to your food.
Using Lighter Fluid: Safety and Timing
Lighter fluid accelerates ignition by soaking charcoal with flammable liquid. Apply fluid to your charcoal pile, wait 30 seconds for it to soak in, then light with a long match or grill lighter.
Safety requirements:
- Never add fluid to lit or hot coals
- Use only charcoal-specific lighter fluid
- Keep the bottle away from flames
- Store fluid in a cool, dry place
Wait at least 20 minutes before cooking to let the fluid burn off completely. Residual chemicals create white smoke and can leave a petroleum taste on food.
The coals are safe for cooking when they’re covered in gray ash and produce thin, clear smoke. Lighter fluid reduces initial lighting time to 2-3 minutes but extends total prep time due to the required burn-off period.
Electric Starters and Other Techniques
An electric starter is a heating element that ignites charcoal through direct contact. Place the loop in your charcoal pile, plug it into an outlet, and wait 8-10 minutes.
Remove the starter when coals begin glowing red and developing white edges. The charcoal needs an additional 10-15 minutes to fully ash over and reach cooking temperature.
Electric starters work best with lump charcoal, which lights faster than briquettes. You need access to an electrical outlet within cord length of your grill.
Other techniques include propane torch starters and charcoal starter guns. These tools direct concentrated heat at the charcoal base, creating ignition in 5-7 minutes. They’re portable options that don’t require electricity or lighter fluid.
Achieving and Managing Grill Temperature
 Once your charcoal is properly lit and ready, maintaining the right grill temperature requires active monitoring and adjustment. Temperature control determines whether your food cooks evenly or burns on the outside while remaining raw inside.
Using Grill Thermometers for Accuracy
A grill thermometer provides precise temperature readings at the cooking surface. Built-in lid thermometers often read 50-75°F higher than the actual grate temperature because they measure air temperature rather than cooking surface heat.
Place a probe thermometer at grate level for accurate readings. Digital instant-read thermometers give you real-time data within seconds. For consistent results, check temperature in multiple spots across the grill grate since heat distribution varies.
Target temperatures depend on what you’re cooking. High heat registers at 450°F and above for searing steaks. Medium-high heat sits between 400-450°F for chicken and vegetables. Medium heat ranges from 350-400°F for thicker cuts. Low heat measures 250-300°F for slow cooking.
Adjusting Grill Vents for Optimal Heat
Grill vents control oxygen flow to the charcoal, which directly affects temperature. The bottom vents pull air in while the top vents release heat and smoke.
Open both vents fully to increase temperature and make charcoal burn hotter. Close them partially to reduce heat and extend burn time. Never close vents completely during cooking or the fire will die out.
Adjust the bottom vents first for major temperature changes. Use the top vents for fine-tuning. If the temperature drops below your target, open the bottom vent wider and wait 5-10 minutes before checking again.
Direct and Indirect Grilling Zones
Direct grilling places food directly over hot coals for high-heat cooking. This method works best for thin cuts that cook quickly like burgers, steaks, and kebabs. The intense heat creates a flavorful crust through the Maillard reaction.
Indirect grilling positions food away from the coals with heat circulating around it. Arrange coals on one side of the grill and place food on the opposite side. This setup functions like an oven and prevents burning on larger items.
Create a two-zone fire for maximum flexibility. Bank all your coals on one side for direct heat while leaving the other side empty for indirect cooking. Move food between zones as needed to control browning and prevent flare-ups.
Advanced Tips: Maximizing Burn and Reusing Charcoal
 You can extend your charcoal’s usefulness by reusing partially burned pieces and applying controlled burning techniques. These methods reduce fuel costs and maintain consistent heat across multiple grilling sessions.
Reusing and Managing Charcoal for Multiple Sessions
You can reuse charcoal that still has mass and hasn’t turned to ash. After grilling, close all vents on your grill to cut off oxygen and extinguish the coals. Once cooled, separate the larger unburned pieces from the ash using a metal scoop or grate.
Store reused charcoal in a dry, sealed container to prevent moisture absorption. Wet charcoal lights poorly and produces uneven heat.
Best practices for reusing charcoal:
- Mix old charcoal pieces with fresh fuel at a 1:3 ratio
- Place reused pieces at the bottom of your charcoal stack
- Light fresh charcoal on top to ignite the older pieces gradually
- Avoid reusing charcoal that crumbles easily or appears overly brittle
Briquettes typically offer better reuse potential than lump charcoal due to their density. You can reuse quality briquettes two to three times before they lose effectiveness.
Extending Burn Time for Long Cooks
The snake method arranges unlit briquettes in a C-shape around your grill’s perimeter with lit coals at one end. This setup burns slowly and steadily for 8-12 hours without adding fuel.
The minion method places unlit charcoal in your firebox with a small amount of lit coals on top. The fire gradually ignites downward, providing 6-8 hours of consistent heat for smoking.
Close your bottom vents to half or three-quarters of the way to reduce oxygen flow. Keep your top vent partially open to maintain airflow without accelerating the burn rate. Use a charcoal basket or fire ring to contain your fuel in a tight formation, which limits air exposure between pieces and prevents rapid burning.