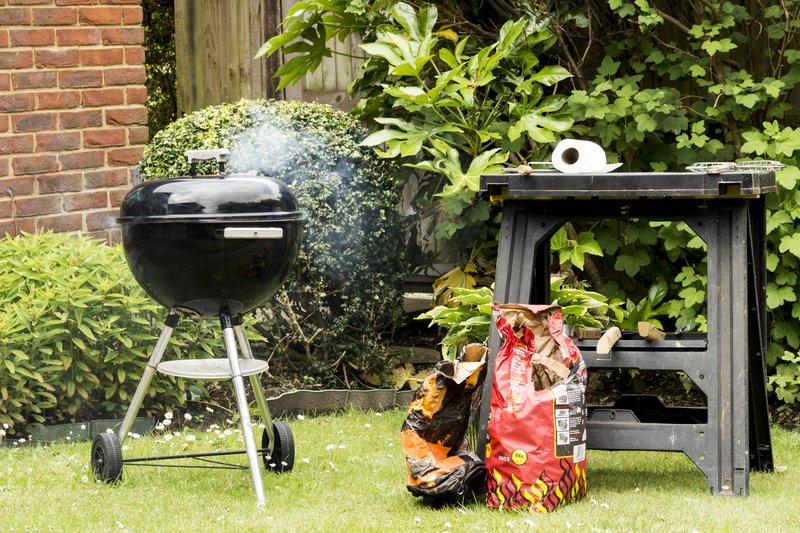
How Long Should Charcoal Burn Before Cooking? A Guide to Perfectly Grilled Food
Getting the timing right when lighting charcoal can make the difference between a perfect meal and a disappointing one. You might think you just light it and start cooking, but the truth is more specific.
You should let charcoal burn for 15 to 30 minutes before cooking, depending on whether you’re using briquettes or lump.
This waiting period allows the fuel to reach the right temperature and burn off chemicals that could affect your food’s taste.
Understanding when your charcoal is ready involves more than watching the clock. You need to know what visual signs to look for, how different types of charcoal behave, and what temperature your specific recipe requires.
The method you use to light it and even the weather outside both play a role in how long you’ll wait.
Why Charcoal Burn Time Matters
Getting your charcoal to burn for the right amount of time before cooking affects everything from flavor to how safely and evenly your food cooks. Spending 15–20 minutes allowing the charcoal to burn properly lays the groundwork for consistent heat and better cooking results.
Effects on Flavor and Cooking Results
When you rush the charcoal burn process, your food pays the price. Charcoal that hasn’t burned long enough produces thick, acrid smoke that makes your meat taste bitter and unpleasant.
This happens because the charcoal releases chemicals and impurities during its early burning phase. Properly burned charcoal develops a light gray ash coating.
This signals that the fuel has reached its clean-burning stage and will give your food that desirable smoky flavor instead of a harsh, chemical taste.
The temperature stability of well-burned charcoal also impacts your cooking results. When you add food too early, the fluctuating heat creates hot spots and cool zones across your grill.
This leads to chicken that’s charred on the outside but raw inside, or steaks with uneven sear marks.
Safety Implications of Proper Burn
Underburned charcoal poses real safety risks that many grillers overlook. Fresh charcoal produces high levels of carbon monoxide during its initial burning phase.
This colorless, odorless gas can build up in enclosed or poorly ventilated areas and cause serious health problems. Waiting the full 15-20 minutes allows most of these dangerous gases to burn off before you start cooking.
The gray ash coating that develops serves as a visual safety indicator that the charcoal has moved past its most toxic burning stage. Premature cooking also increases your risk of flare-ups.
Charcoal that hasn’t fully ignited contains volatile compounds that can suddenly ignite when grease drips onto them. These unexpected flames can burn you or char your food beyond recognition.
Even Cooking and Temperature Stability
Your charcoal needs enough time to heat evenly so all the coals reach a consistent temperature. Allowing the charcoal to fully heat ensures each piece reaches roughly the same level of heat.
This creates an even cooking surface where every part of your grill performs the same way. Temperature consistency matters most for foods that require precise cooking times.
A chicken breast needs steady heat to cook through without drying out. Fish fillets require uniform temperature to avoid falling apart on one side while staying raw on the other.
Once charcoal has fully heated, it holds a consistent temperature for a longer period. Coals with a gray ash coating deliver steady heat for hours, whereas charcoal that hasn’t finished heating fluctuates and requires constant attention.
Understanding the Stages of Charcoal Burning
Charcoal goes through three distinct stages from the moment you light it until it’s ready for cooking. Each stage has specific characteristics that affect both the temperature and the flavor your food will have.
It’s important to recognize when your charcoal has reached the proper cooking stage.
Ignition and Initial Flames
When you first light your charcoal, you’ll see tall, active flames. These flames are burning off volatile compounds and chemicals from the charcoal’s production process.
During this stage, the charcoal needs about 5–10 minutes to reach the proper heat level. Cooking should wait until this step is complete.
The temperature is unstable and inconsistent across the charcoal bed. The flames release compounds that will make your food taste bitter or chemical-like.
You’ll notice the flames are yellow or orange and quite visible. The charcoal pieces will still look mostly black with only small areas showing red heat.
Your grill temperature will be climbing but hasn’t reached a stable level yet.
Transition to Glowing Embers
After the initial flames die down, your charcoal enters a transition phase. The tall flames reduce to occasional small flickers, and you’ll start seeing glowing embers appear.
This stage takes about 5-10 additional minutes. The charcoal pieces begin showing a red or orange glow beneath a developing ash layer.
The temperature becomes more stable but still needs more time to reach the ideal cooking range. You can test readiness by holding your hand about 6 inches above the grill grate.
If you can only keep it there for 2-3 seconds, the heat is approaching the right level. The charcoal burning continues to build consistent heat during this phase.
Gray Ash as the Readiness Indicator
The final stage is when your charcoal is covered with a light gray ash coating. This signals that how long should charcoal burn before cooking has been satisfied—typically 15-20 minutes total from initial lighting.
The gray ash layer means the volatile compounds have burned off completely. Your charcoal now produces clean, consistent heat perfect for cooking.
The entire charcoal bed should glow red beneath the ash when you look closely.
Signs your charcoal is ready:
Light gray ash coating covers most pieces
No visible flames, only occasional flickers
Consistent red glow underneath the ash
Steady heat output across the cooking area
How Long Should Charcoal Burn Before Cooking?
Wait 15-30 minutes for charcoal to reach proper cooking temperature, with lump ready in 10-20 minutes and briquettes requiring 15-30 minutes.
The coals should develop a light gray ash coating and stop producing flames before you start cooking.
Optimal Burn Times for Different Charcoal Types
Lump charcoal burns faster and reaches cooking temperature in 10-20 minutes. This charcoal is made from pure hardwood pieces without additives or fillers.
The irregular shapes and lower density allow it to ignite quickly and heat up rapidly. Charcoal briquettes need 15-30 minutes to reach the right temperature.
These compressed blocks contain wood byproducts, coal dust, and binding agents that make them denser. The added materials slow down the ignition process but provide more consistent heat over time.
Your choice between these two types affects your timing. If you want to start grilling quickly, lump gets you cooking faster.
Briquettes require more patience but deliver steadier heat for longer cooking sessions.
Visual and Temperature Cues for Readiness
Look for a light gray ash layer covering 80-90% of the charcoal surface. The coals underneath should glow red.
This ash coating shows the charcoal has burned past the initial high-flame stage and reached stable temperature. The flames should have died down completely before you add food.
Active flames create uneven heat and can burn your food’s exterior while leaving the inside undercooked. You want radiant heat from the coals, not direct flame contact.
Check the temperature by holding your hand five inches above the grill grate. If you can keep it there for 2-3 seconds, the heat is high (450-550°F).
Four to five seconds indicates medium heat (350-450°F), and 6-7 seconds means low heat (250-350°F).
Adjusting Wait Time for Cooking Methods
High-heat searing requires fully ignited charcoal at maximum temperature. Wait until the coals are completely ashed over and glowing bright red underneath.
This gives you the 500°F+ temperatures needed for steaks and burgers. Low and slow cooking needs charcoal that has burned slightly past peak temperature.
Let the coals burn for an extra 5-10 minutes after the ash forms. This brings the temperature down to the 225-275°F range ideal for ribs and brisket.
Indirect grilling works best when coals have reached the gray ash stage. Arrange them to one side of the grill and place food on the opposite side.
The consistent heat from properly burned charcoal maintains steady temperatures for roasting chicken or vegetables.
Typical Time Ranges for Lump Charcoal and Briquettes
Lump reaches cooking temperature faster but burns hotter initially. The 10-20 minute range applies to standard amounts used for direct grilling.
Larger quantities may need a few extra minutes to ensure even ignition throughout the pile. Briquettes take longer but provide more predictable results.
The 15-30 minute window gives them time to burn off any chemical odors from binders and reach stable temperature. Cold weather or wind can extend this time by 5-10 minutes.
Your grill’s ventilation affects these timeframes. Open vents increase airflow and speed up burning, while closed vents slow it down.
Start with vents fully open during the initial burn, then adjust once the charcoal reaches the gray ash stage.
Key Factors Affecting Charcoal Burn Time
The time your charcoal needs to burn before cooking depends on several factors that directly impact how quickly it reaches the right temperature. Your choice of charcoal, lighting method, and the weather all play important roles in determining when your grill is ready.
Charcoal Types and Quality
The type of charcoal you choose makes a big difference in burn time. Lump burns hotter and faster than briquettes because it’s made from pure hardwood without additives.
You can expect lump charcoal to be ready in about 15 minutes. Briquettes take longer to reach cooking temperature, usually 20-25 minutes.
They’re made from compressed wood byproducts and binding agents. The quality of charcoal matters just as much as the type.
High-quality hardwood charcoal lights more consistently and burns cleaner than cheaper options. Lower-quality charcoal often contains more fillers and produces more ash.
This extra ash can block airflow and extend the time needed before cooking. Premium charcoal brands typically provide more consistent results and predictable burn times.
Lighting Methods and Tools
Your lighting method really shapes how fast your charcoal gets ready for cooking. A charcoal chimney starter stands out as both fast and reliable. This metal cylinder pulls heat and airflow together, so your coals are usually ready in about 15-20 minutes.
An electric charcoal starter works at roughly the same speed, heating coals from below by direct contact. Both of these skip lighter fluid, which can tack on extra minutes and sometimes leaves an odd taste on your food.
Going with traditional lighter fluid? You’ll need a bit more patience. The fluid has to burn off completely before you hit a stable cooking temperature, often adding 5-10 minutes compared to a chimney starter.
Environmental and Weather Conditions
Wind can speed up charcoal lighting by boosting oxygen flow. Your coals might be ready 3-5 minutes sooner on breezy days, but the trade-off is that fuel burns up quicker during cooking.
Cold weather, on the other hand, slows everything down. If temperatures dip below 40°F, tack on another 5-10 minutes to your usual burn time. Charcoal just doesn’t like to get hot or stay hot when it’s cold out.
Humidity isn’t as dramatic, but it still matters. Charcoal stored in damp places lights slower and can burn unevenly. Keep your charcoal dry if you want consistent results.
Techniques for Lighting and Preparing Charcoal
How you light your charcoal really sets the stage for grilling. Chimney starters are chemical-free and reliable, electric starters offer convenience, and lighter fluid is the classic route—though it needs some care.
Using a Chimney Starter
A charcoal chimney starter is a metal cylinder designed to light charcoal quickly and evenly, without any chemicals. Just fill the top with charcoal and stuff crumpled newspaper or fire starters in the bottom chamber.
Light the newspaper through the holes at the base. The flames climb up, igniting the charcoal from below.
When flames poke out the top and the coals start turning gray, you’re about 15 to 20 minutes in and ready to go. If you want to move things along, try using two sheets of newspaper instead of one.
Once the coals look ready, pour them into your grill—use heat-resistant gloves for safety. The chimney method gives you consistent results and avoids any chemical aftertaste.
Applying Lighter Fluid Safely
Lighter fluid needs careful handling. Pour it over the charcoal in a slow, steady stream—about 1/4 cup per pound of charcoal is usually enough.
Wait 30 seconds after pouring so the fluid can soak in. Then, ignite the charcoal from several spots using long matches or a long-nosed lighter.
Never add lighter fluid to already-lit coals. That’s a recipe for dangerous flare-ups and possible burns.
Let the charcoal burn for 20 to 30 minutes until it’s covered in gray ash. Waiting ensures the lighter fluid burns off so it won’t affect the flavor of your food.
Electric and Alternative Starters
An electric charcoal starter is basically a heated metal loop. Place it in your bed of coals and plug it in for 8 to 10 minutes.
Once the coals touching the starter glow red, unplug and let the starter cool before removing. No flames or chemicals involved, but you’ll need an outlet nearby.
Other options include propane torch starters and natural fire starter cubes. Fire starter cubes—made of compressed sawdust or wax—burn long enough to ignite charcoal without chemicals.
Controlling Grill Temperature for Best Results
Lighting charcoal is just the beginning. Managing grill temperature through vents and monitoring tools is what really ensures even cooking.
Adjusting Grill Vents and Airflow
Grill vents are your main tool for controlling heat. Opening the bottom vent lets in more oxygen, raising the temperature. Closing it cuts oxygen and drops the heat.
The top vent plays a role too, especially with smoke. Keep it open for higher heat and better airflow, or close it partly to trap heat and smoke for slower cooks.
Basic vent settings:
High heat (450-550°F): Both vents fully open
Medium heat (350-450°F): Vents half open
Low heat (250-350°F): Bottom vent quarter open, top vent half open
Make small adjustments and wait 5-10 minutes to see the effect. Quick changes can lead to temperature swings that throw off your cooking.
Monitoring Grill Temperature
A grill thermometer is essential for accuracy. Built-in lid thermometers often read 50-75°F higher than the actual grate temperature.
Place a probe thermometer at grate level where your food sits. Digital thermometers with wireless monitors let you check without lifting the lid. Each time you open the lid, you lose heat and add 5-10 minutes to the process.
Check temperature every 15-20 minutes during long cooks. For quick grilling under 30 minutes, just verify temperature before adding food.
Maintaining Consistent Heat
Add 5-10 fresh charcoal briquettes every 30-45 minutes for longer sessions. This keeps your temperature steady as old coals burn out.
Arrange coals to match your cooking method. Banking them to one side gives you a two-zone setup, while spreading them evenly provides consistent medium heat.
Keep the lid closed as much as possible. Opening it can drop the temperature by 50-100°F instantly. Wind and cold require more fuel and tighter vent control to keep heat stable.
Grilling Approaches and Cooking Techniques
After your charcoal has burned for 15-20 minutes and developed a gray ash, it’s time to pick the right grilling method. The approach you choose really depends on what you’re cooking and how thick it is.
Direct Grilling Tips
Direct grilling means putting food right over hot coals. It’s best for foods that cook quickly—burgers, steaks, chicken breasts, hot dogs, vegetables, you name it.
Arrange your charcoal in an even layer. Place food directly above the heat source. This produces high temperatures, usually between 450-650°F, which sear the outside nicely.
Leave the lid open for thin cuts to avoid overcooking. For thicker cuts, close the lid to trap heat and cook the inside while maintaining the sear.
Common foods for direct grilling:
Steaks and burgers (1 inch thick or less)
Chicken pieces (boneless breasts and thighs)
Fish fillets
Sliced vegetables
Kebabs
Indirect Grilling Methods
Indirect grilling means pushing charcoal to the sides, with food in the middle where there’s no direct heat. This setup turns your grill into more of an oven.
It’s the go-to method for larger cuts that need longer cooking times. Temperatures are lower, usually 225-350°F, so you avoid burning the outside while the inside cooks through.
Put a drip pan under the food to catch juices and prevent flare-ups. Keep the lid closed for steady heat. Add fresh charcoal every 45-60 minutes for longer cooks.
This method works well for whole chickens, ribs, roasts, and thick pork chops that need at least 30 minutes on the grill.
Selecting the Right Cooking Method
Pick your method based on food thickness and required cooking time. Foods under 1 inch thick and done in less than 20 minutes fit direct heat. Thicker or longer-cooking foods need indirect heat.
You can also combine both methods. Sear thick steaks over direct heat for 2-3 minutes per side, then finish them over indirect heat to reach your desired doneness.
A two-zone setup gives you flexibility—push all coals to one side for a hot direct zone and a cooler indirect zone. Move food between zones as needed during cooking.
Best Practices and Common Mistakes
Getting your charcoal ready is just the start. Avoiding mistakes and caring for your grill helps you cook better food every time.
Overcrowding the Grill
Packing too much food onto your grill creates problems. When items are too close, air can’t flow around each piece, so heat doesn’t reach all surfaces evenly.
Overcrowding also drops the grill temperature quickly, making food steam instead of sear. You lose that crisp, charred exterior that makes grilled food so appealing.
Leave at least an inch between each piece. This gives heat room to circulate and makes flipping easier. Keep one section empty so you can move food away from flare-ups or high heat.
Common Pitfalls to Avoid
Starting to cook before your charcoal is fully covered in light gray ash is a common mistake. The coals are still burning off chemicals that can ruin your food’s flavor. Wait the full 15-20 minutes for lump charcoal or 20-30 minutes for briquettes.
Never use water to extinguish your charcoal. It creates dangerous steam and can crack your grill. Instead, close the vents to cut off oxygen and let the fire die out safely.
Adding lighter fluid to already-lit charcoal is risky and leaves an unpleasant taste. Not checking your grill’s temperature before cooking can also lead to burnt or undercooked meals—always use a reliable thermometer.
Regular Grill Maintenance
Clean your grill grates after every use to prevent buildup. Use a grill brush while the grates are still warm to remove stuck-on food and grease—it only takes a few minutes but makes a big difference.
Empty ash from the bottom of your grill regularly. Too much ash blocks airflow and makes temperature control harder. Check vents to make sure they open and close smoothly without debris.
Inspect grates for rust or damage before each session. Replace any with holes or severe rust. Wipe down the outside of your grill with warm soapy water to remove grease and prevent corrosion.
Maximizing Charcoal Efficiency and Reuse
Extending charcoal life and cutting waste comes down to proper storage and smart reuse. Adding fresh charcoal at the right moment keeps your heat steady during long cooks.
Reusing and Storing Charcoal
You can reuse charcoal safely if you’re careful. After grilling, close all vents to cut off oxygen and extinguish the embers. Let the grill cool completely before removing partially burned pieces.
Store leftover charcoal in a tightly sealed metal container to keep out moisture. Wet charcoal is tough to light and burns unevenly. Keep your container somewhere dry.
When reusing charcoal, mix old pieces with fresh at about a 1:1 ratio. Used charcoal won’t burn as hot as new. Knock off excess ash before relighting—this improves airflow and helps everything burn more efficiently.
When and How to Add More Charcoal
You’ll notice it’s time to add more charcoal when the temperature slips below your target range or if you’re planning to cook for a long stretch. It’s best to light new charcoal in a chimney starter before introducing it to your grill.
Adding unlit charcoal straight onto the fire isn’t a great idea—it gives off chemicals and smoke that can mess with the taste of your food. Wait for the new charcoal to develop a gray ash coating and glowing embers; this usually takes about 10-15 minutes in a chimney starter.
Once the charcoal’s ready, pour it carefully over the existing embers, aiming for the spots where you need a bit more heat. For those longer, low-and-slow sessions, it’s wiser to add small amounts of charcoal every hour instead of dumping in a large batch.