How Do You Make Charcoal Burn Slower? Proven Methods for Longer Grilling
Getting charcoal to burn slower gives you better control over cooking temperature and more time before needing to add fuel.
The key to making charcoal burn slower is to limit oxygen by closing your grill’s air vents and arranging your coals in patterns like the snake or Minion method.
Less airflow means the coals burn at a lower temperature and last longer.
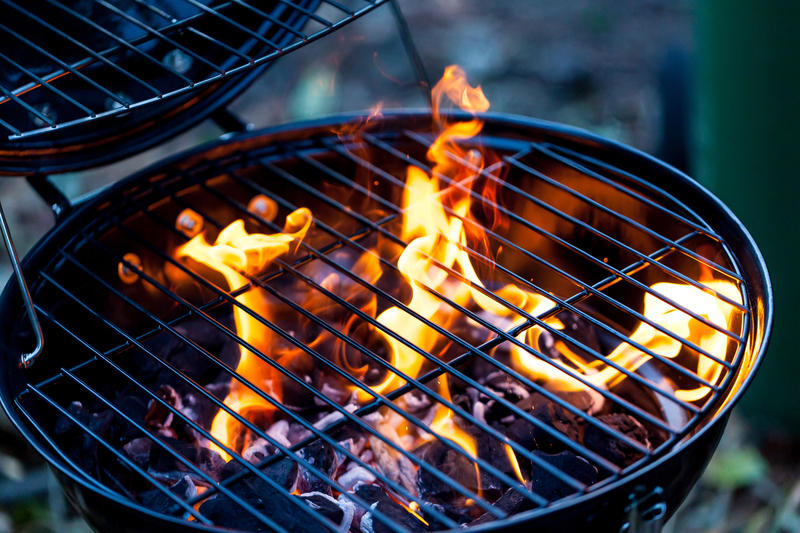
If you’ve ever had charcoal burn out too fast during a long cook, you’re not alone.
Maybe you were halfway through smoking ribs or a brisket when the temperature dropped because the fuel ran out. It’s a common frustration, but once you understand how charcoal burns and what factors influence it, you can prevent it from happening again.
This guide covers practical steps to extend your charcoal burn time.
You’ll see which types of charcoal are best for slow burning, how to set up your coals for efficiency, and how to work your vents for better fire control. These techniques can help you maintain steady heat for hours, so you won’t be constantly checking your grill.
Understanding Charcoal Burn Time
Charcoal burn time depends on how the fuel burns and the specific type you select.
Briquettes generally last longer than lump charcoal because they’re dense and uniform in shape.
How Charcoal Burns and Loses Heat
Charcoal burns through combustion, which needs fuel, oxygen, and heat. Oxygen feeds the charcoal, igniting the carbon and creating heat.
The more oxygen gets in, the faster the coals burn and the hotter your grill runs.
Heat leaves your grill in three ways: conduction through the metal, convection as hot air escapes through vents, and radiation from the coals to your food and grill walls.
Your vents are the main tool for controlling oxygen. Open vents mean more air and a faster, hotter burn. If you nearly close the vents, you restrict airflow and slow everything down.
With vents barely open, a grill can hold low temperatures for hours on the same batch of charcoal.
Types of Charcoal and Their Lifespans
Lump charcoal is just carbonized wood, no additives. It lights fast and burns hot, but the irregular shapes create air gaps that speed up burning.
Under normal grilling, lump charcoal burns for about 2-3 hours.
Charcoal briquettes are compressed blocks of wood byproducts, binders, and fillers. Their density gives them a longer, more predictable burn time.
Quality charcoal briquettes can burn steadily for 4-6 hours at moderate temperatures, which is ideal for longer cooks.
The brand and quality do matter. Premium briquettes use better ingredients and burn longer, while cheaper ones with lots of filler tend to burn out faster and produce more ash.
Essential Tools and Equipment
The right tools make controlling your charcoal burn much easier.
A chimney starter lets you light just the amount you need, a charcoal basket keeps your fuel organized, and quality grill accessories give you better control over airflow and temperature.
Using a Chimney Starter Properly
A chimney starter is the best way to control how much charcoal you light at once. For slower burns, you usually only want to light a small amount—about 8-12 briquettes—when using the Minion or snake setup.
Fill the chimney about a quarter full. Place crumpled newspaper or a fire starter cube underneath and set it on a fireproof surface.
Light the paper and wait until the top coals are covered in gray ash. This usually takes 10-15 minutes.
Pour the lit coals onto your pile of unlit charcoal, according to your chosen method. The chimney helps you avoid lighting too many coals at once, which is a common cause of fires burning too hot and fast.
Never fill your chimney starter all the way if you want a long, slow burn.
Benefits of a Charcoal Basket
A charcoal basket organizes your fuel and improves airflow beneath the coals. This creates a more efficient, controlled burn that lasts longer than if charcoal is scattered across the grill floor.
The basket raises your coals slightly, letting ash fall away instead of smothering the fire. Better airflow means you can keep low temperatures with less oxygen, so your fuel lasts longer.
Charcoal baskets also make arranging Minion or snake setups easier. Adjustable baskets are available to fit different grill sizes.
For kettle grills, a metal basket costs around $20-40 and can make temperature control much simpler.
Choosing the Right Grill and Accessories
Your grill type matters quite a bit. Kamado-style grills like the Big Green Egg have thick ceramic walls, providing excellent insulation.
These grills can maintain stable temperatures for 12-18 hours on one load of charcoal because they lose so little heat.
Standard kettle grills work well for long burns but need more attention to vent settings. They’re less insulated, so you’ll use a bit more fuel, especially in cold weather.
A grill thermometer is essential. Built-in lid thermometers are often inaccurate, so use a digital probe at grate level for better results.
Quality vents that seal tightly are more important than you might expect. Cheap grills with loose lids and vents leak air, making slow burns difficult.
Choosing the Best Charcoal for Long Burns
The charcoal you buy directly impacts how long your fire lasts. Briquettes burn longer and more steadily than lump charcoal, and brand quality affects how much real fuel you get for your money.
Comparing Lump Charcoal vs. Briquettes
Briquettes are usually the best choice for slow, long burns. These compressed blocks are designed for steady, extended heat.
A typical briquette can burn 30-50% longer than lump charcoal. Their uniform shape and density make for consistent airflow and predictable combustion.
With a full load of quality briquettes in a well-set-up grill, you can get 8-12 hours of heat.
Lump charcoal, on the other hand, burns hotter and faster. It’s just carbonized wood, so it lights quickly but also uses up fuel faster. The irregular pieces create air pockets, which increases oxygen flow and speeds up burning.
Use lump charcoal for high-heat searing. For hours of low, stable heat, go with briquettes.
Quality charcoal has more carbon and less filler. Look for briquettes that feel heavy and dense. Cheap brands often use more binders and create more ash, which can clog vents during long cooks.
Check the ingredient label. The best briquettes list wood char or charcoal as the first ingredient, with minimal additives. Avoid products with lots of coal dust, limestone, or chemical accelerants.
Signs of quality charcoal:
Dense, solid pieces with few broken fragments
Minimal dust in the bag
Clean burning with light gray ash
Consistent piece sizes
Premium brands cost more, but they burn 20-30% longer than budget options. You’ll use less fuel and get better temperature control overall.
Arranging and Lighting Charcoal for Slow Burning
How you arrange and light your charcoal is crucial for burn time. The minion and snake methods both work by lighting just a few coals and letting the fire spread slowly through unlit fuel, producing hours of steady heat.
The Minion Method Explained
The minion method delivers long, stable burns by placing a small amount of lit charcoal on top of a pile of unlit briquettes.
Fill your charcoal basket with unlit briquettes, leaving a small well in the center. Light 8 to 12 briquettes in a chimney starter and wait until they’re fully ashed over.
Pour these lit coals into the well. The fire spreads slowly outward and downward through the unlit charcoal. Place smoking wood chunks around the edges for gradual flavor.
This setup is especially effective in kamado grills and drum smokers. Depending on grill size and vent settings, you can get 8 to 18 hours of burn time.
Keep vents mostly closed to limit airflow and extend the burn.
How to Use the Snake Method
The snake method arranges briquettes in a C-shape along the grill’s edge. Line up two rows, two briquettes wide and two high, leaving the center open for a water pan.
Light 5 to 8 briquettes in your chimney starter and place them at one end of the snake. The fire burns like a fuse, slowly moving from one end to the other.
Position your top vent above the food, opposite the lit end. This pulls smoke across the meat as the snake burns.
A properly built snake in a 22-inch kettle grill can burn for 8 to 12 hours. Add wood chunks on top of the snake at intervals for steady smoke.
Setting Up a Two-Zone Fire
A two-zone fire splits your grill into direct and indirect heat areas by piling all the charcoal on one side. This setup gives you some control over burn speed by managing how you add charcoal and where you light it.
Bank unlit charcoal on one side. Light a smaller amount separately and place it at the bottom or front of the unlit pile.
The fire spreads gradually into the larger pile. Food cooks on the cool side, away from direct heat.
This method is simpler than the minion or snake but usually burns a bit faster. It’s suitable for 4 to 6 hour cooks like chicken or small pork roasts.
You can extend burn time by adding charcoal to the unlit side as needed. Adjust vents to keep lower temperatures, ideally around 225°F to 275°F.
Managing Airflow and Temperature Control
Airflow through your charcoal grill directly impacts burn rate and heat levels.
By adjusting vents and monitoring temperature, you can keep charcoal burning slower and more steadily.
Adjusting Top and Bottom Vents
Your grill has two types of vents that work together to control airflow. The bottom vents bring oxygen to the charcoal, while the top vents let heat and smoke escape.
When you want charcoal to burn slower, you need to limit the oxygen supply. Start by closing the bottom vents about halfway.
This reduces the amount of air reaching the coals and slows down the burn rate. The top vents should stay mostly open to maintain airflow and prevent the fire from going out completely.
Never close both vents completely. This will smother your fire and create a buildup of gases that can affect food flavor.
Make small adjustments of about a quarter turn at a time, then wait 10-15 minutes to see how the temperature responds. For low and slow cooking around 225-250°F, keep bottom vents open just 25-30% and top vents around 50-75%.
These settings will vary based on your specific grill model and weather conditions.
Maintaining Consistent Temperatures
Use a reliable thermometer placed at grate level to track your actual cooking temperature. The built-in thermometer on most grill lids is often inaccurate and measures dome temperature rather than where your food sits.
Check your temperature every 30 minutes without opening the lid. Each time you lift the lid, you lose heat and disrupt the airflow pattern you’ve established.
Digital thermometers with probes let you monitor temperature without disturbing your setup. When temperature drops below your target, open the bottom vents slightly.
When it rises too high, close them a bit more. Make one small adjustment at a time and wait before making another change.
Add 5-8 fresh briquettes every hour during long cooks to maintain steady heat without causing temperature spikes.
Preventing Flare-Ups During Cooking
Flare-ups happen when fat drips onto hot coals and ignites. These sudden bursts of flame burn charcoal faster and can char your food.
A two-zone fire setup helps prevent this problem by keeping your food away from direct heat. Place a drip pan filled with water under your food in the indirect zone.
This catches drippings before they hit the coals and adds moisture to your cooking chamber. The water also acts as a heat buffer that stabilizes temperature.
Trim excess fat from meat before grilling. While some fat adds flavor, large amounts create more opportunities for flare-ups.
If flames do appear, move food to the cooler zone temporarily rather than spraying with water, which can create ash and temperature fluctuations.
Expert Techniques for Low and Slow Charcoal Grilling
Mastering low and slow grilling requires specific techniques that go beyond basic fire management. Setting up proper heat zones, managing smoke throughout extended cooks, and making the most of your fuel will help you produce restaurant-quality results for tough cuts like brisket and pork shoulder.
Indirect Cooking for Large Cuts
Indirect cooking means placing your meat away from the lit charcoal so it cooks from surrounding heat rather than direct flames. This setup is essential for large cuts that need several hours to break down tough connective tissue.
For a basic two-zone fire, push all your lit charcoal to one side of the grill. Place your brisket, ribs, or pork shoulder on the opposite side.
This creates a cooking zone that maintains steady temperatures between 225°F and 275°F. On round grills like the Weber Kettle, arrange your charcoal in a half-moon shape along one edge.
Position your meat in the center, as far from the coals as possible. Place a drip pan filled with water under the meat to catch drippings and add moisture to the cooking environment.
For vertical smokers with deeper fire boxes, the charcoal sits at the bottom with a water pan and heat deflector between the fire and cooking grate. This natural separation makes temperature control easier for long cooks of turkey or large pork shoulders.
Optimizing Smoke Flavor Over Long Cooks
Wood chunks provide better smoke flavor than chips during extended cooking sessions because they burn slower and more consistently. Place 3-4 chunks of hardwood directly on top of your unlit charcoal before adding the starter coals.
The wood will ignite gradually as the fire spreads, releasing smoke throughout the cook rather than all at once. Hickory works well for pork and ribs, while oak complements brisket without overpowering the beef flavor.
Avoid adding too much wood at once. More than 4-5 chunks creates thick, bitter smoke that makes meat taste acrid rather than pleasantly smoky.
You want thin, blue smoke, not thick white billows. Add one or two fresh chunks every 2-3 hours if you want more smoke.
Only add wood during the first half of your cook, as meat stops absorbing smoke flavor once it reaches an internal temperature around 140°F.
Reusing Charcoal to Maximize Efficiency
Unburned charcoal left in your grill after cooking is still usable for your next session. Let the grill cool fully before dumping out the ash and keeping the larger charcoal pieces.
Mix these leftover pieces with new charcoal for your next fire. Used charcoal tends to light a bit faster than fresh fuel, which can help stretch your supply.
This approach is especially helpful if you often grill at lower temperatures, where charcoal doesn’t always burn all the way through.
Store any reused charcoal in a dry container to keep out moisture. Wet charcoal leads to more smoke and can make temperature control tricky.
Check the ash content before reusing. Charcoal that’s coated in thick gray ash won’t give off much heat.
Pieces that remain mostly black with just a little ash are usually fine for another cook.


 Mastering low and slow grilling requires specific techniques that go beyond basic fire management. Setting up proper heat zones, managing smoke throughout extended cooks, and making the most of your fuel will help you produce restaurant-quality results for tough cuts like brisket and pork shoulder.


