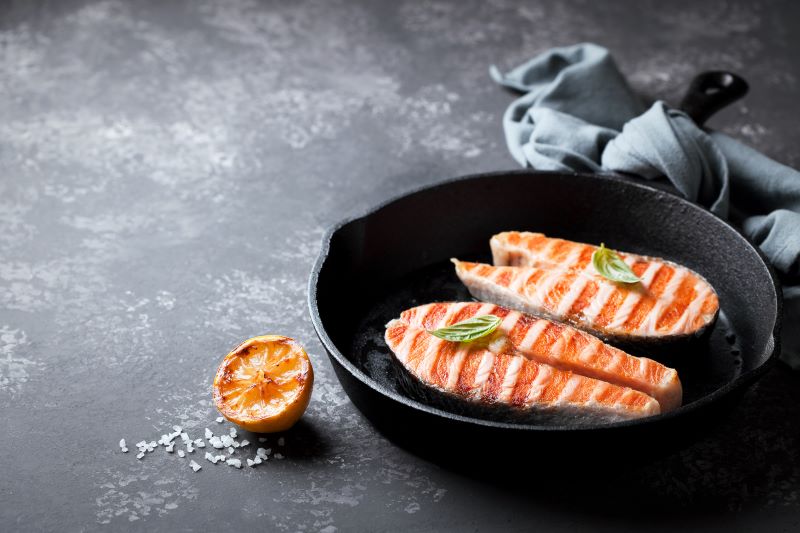


Pan seared salmon is one of the fastest ways to cook restaurant-quality fish at home, taking just 8 to 10 minutes from start to finish. The technique works by cooking salmon fillets in a hot pan with oil, creating a golden brown crust on the outside while keeping the inside tender and moist. You don’t need special skills or fancy equipment to master this method.
The key to perfect pan seared salmon is starting with room temperature fish, using medium-high heat, and cooking skin-side up first for about 5 minutes before flipping.
This approach gives you crispy skin and evenly cooked flesh without overcooking. The fish is done when it reaches 125°F to 145°F internally, depending on whether you prefer medium-rare or fully cooked salmon.
This guide walks you through selecting the right salmon, gathering your ingredients, and executing the technique step by step. You’ll also learn how to make complementary sauces, pair your salmon with sides, and store leftovers properly for future meals.
Choosing the Best Salmon for Pan Searing
 The quality and type of salmon you select directly affects the texture, flavor, and cooking performance of your pan-seared dish. Wild-caught varieties like sockeye and king salmon offer firmer texture and lower fat content, while farmed Atlantic salmon provides higher fat content that helps prevent drying during cooking.
Fresh vs. Frozen Salmon
Fresh salmon delivers optimal flavor and texture for pan searing when purchased within 24-48 hours of catch. You should look for salmon fillets with bright, vibrant color and firm flesh that springs back when pressed. The fish should smell clean and oceanic, not fishy or ammonia-like.
Frozen salmon can perform nearly as well as fresh if it was flash-frozen immediately after harvest. This method preserves the cellular structure and prevents moisture loss. When buying frozen, check that the packaging shows no ice crystals or freezer burn.
You must thaw frozen salmon properly by placing it in the refrigerator for 12-24 hours before cooking. Never thaw salmon at room temperature, as this promotes bacterial growth and creates mushy texture that won’t sear properly.
Skin-On vs. Skinless Salmon Fillets
Skin-on salmon fillets are the superior choice for pan searing because the skin creates a protective barrier between the delicate flesh and the hot pan. The skin crisps up into a flavorful, textured layer while keeping the meat moist. It also makes flipping easier since the skin holds the fillet together.
Skinless salmon fillets require more attention during cooking to prevent sticking and breaking apart. If you choose skinless salmon, you need to use adequate oil and avoid moving the fish until a proper crust forms. The cooking time may be slightly shorter since there’s no skin layer to cook through.
Many cooks prefer to leave the skin on during cooking even if they don’t plan to eat it, then remove it after the salmon is plated.
Wild Salmon vs. Farmed Salmon
Wild salmon species like sockeye, king, and coho have firmer texture and more pronounced flavor due to their natural diet and active lifestyle. They contain less fat than farmed varieties, which means you need to monitor cooking time carefully to avoid dryness. Wild salmon typically costs more but offers richer color and deeper taste.
Farmed Atlantic salmon has higher fat content, making it more forgiving during cooking and less likely to dry out. The consistent marbling throughout farmed salmon filets helps them stay moist even if slightly overcooked. This variety is widely available year-round at lower price points.
Both wild and farmed salmon work well for pan searing. Your choice depends on your budget, flavor preferences, and desired richness in the final dish.
Essential Ingredients for Pan Seared Salmon
 Pan seared salmon requires only four basic ingredients: salmon fillets, cooking fat, salt, and pepper. Additional seasonings and flavor enhancers are optional but can transform a simple preparation into a more complex dish.
Salmon Fillets
Choose 6-ounce fillets that are 1¼ inches thick for best results. This size cooks evenly, developing a golden crust on the outside while staying moist inside.
You can purchase salmon with or without skin. Skin-on fillets hold together better during cooking and create a crispy texture. Skin-off fillets work fine if you prefer to skip this step.
Fresh salmon should smell clean, not fishy. The flesh should be firm and spring back when touched. Look for bright color without any brown spots or gaps in the meat.
Olive Oil and Alternative Fats
Extra-virgin olive oil is the standard choice for pan searing salmon. You need about 1 tablespoon for a 12-inch pan cooking four fillets.
The oil must reach a hot, shimmering state before adding the fish. This temperature creates the sear that forms the golden crust.
Alternative cooking fats include:
- Butter (adds rich flavor but burns at lower temperatures)
- Avocado oil (withstands high heat well)
- Vegetable oil (neutral flavor, high smoke point)
- Combination of butter and oil (balances flavor and heat tolerance)
Cast-iron and stainless steel pans need more fat than nonstick pans. Nonstick surfaces require less oil but still need enough to create proper contact with the fish.
Seasonings: Salt and Pepper
Salt is the most important ingredient after the salmon itself. Use ½ teaspoon of kosher salt for four 6-ounce fillets.
Season the fillets right before cooking. Salt draws out moisture if applied too early, which prevents proper browning.
Freshly ground black pepper adds depth without overwhelming the fish. A few grinds per fillet is sufficient. You can adjust these amounts based on your taste, but adequate seasoning makes the difference between bland and flavorful salmon.
Flavor Variations and Enhancements
Basic salt and pepper work for simple salmon recipes, but other ingredients expand your options. Garlic, fresh thyme, and lemon are common additions that complement the fish’s natural flavor.
Add garlic and herbs to the pan after flipping the salmon. They infuse the cooking fat, which then bastes the fish. Lemon juice or slices can be added at the end to brighten the dish.
Common flavor additions:
- Fresh herbs (thyme, dill, parsley, basil)
- Citrus (lemon, lime, orange zest)
- Garlic (whole cloves or minced)
- Butter (for finishing)
- Spice blends (paprika, cayenne, herbs de provence)
These ingredients transform the basic technique into different flavor profiles. Keep additions simple to let the salmon remain the focus of the dish.
Equipment and Preparation Tips
 The right equipment and proper preparation determine whether your salmon skin crisps perfectly or sticks to the pan. A heavy-bottomed pan, dry fish at room temperature, and the correct tools make the difference between amateur and restaurant-quality results.
Choosing the Right Pan
A stainless steel or cast iron skillet works best for pan-searing salmon. These materials retain heat better than other options and create the high, consistent temperatures needed for crispy skin.
The pan needs to be large enough to hold your fillets without crowding. When fillets touch or overlap, they steam instead of sear, preventing that crispy exterior you want.
Best pan choices:
- Cast iron: Holds heat exceptionally well and creates excellent browning
- Stainless steel: Heats evenly and allows you to see color changes in the oil
Skip nonstick pans for this cooking method. They can’t handle the high heat required for proper searing, and their coatings may degrade at the temperatures needed for crispy skin.
The Lodge cast iron skillet is a beloved kitchen workhorse known for its excellent heat retention and even heating. Because cast iron holds temperature so well, once the skillet is hot it stays hot—making it ideal for searing salmon.
That steady, high heat helps create a beautifully crisp, golden-brown crust on the fish while keeping the interior moist and tender, giving you restaurant-quality results with minimal effort.
Prepping Salmon for the Pan
Remove your salmon from the refrigerator 15 to 20 minutes before cooking. This step brings the fish closer to room temperature, which helps it cook evenly throughout.
Cold salmon contracts when it hits a hot pan, leading to uneven cooking and potential sticking. The outside may overcook while the center remains underdone.
Choose skin-on fillets that are 6 to 8 ounces each. This size cooks through properly while allowing enough time for the skin to crisp without burning.
Patting Salmon Dry and Room Temperature
Moisture is the enemy of crispy skin. Use paper towels or a clean kitchen towel to thoroughly pat both sides of each fillet until completely dry.
Wet fish creates steam when it contacts the hot pan. This steam prevents the Maillard reaction that produces golden-brown, crispy skin and can cause your fillets to stick.
Let the dried fillets sit at room temperature while your pan heats. This short rest period ensures the fish won’t shock when it hits the oil, reducing the chance of sticking and promoting even cooking from edge to center.
Tools for Handling and Flipping
A fish spatula or wide, flat metal spatula gives you the control needed to flip delicate salmon fillets. These tools slide easily under the fish without tearing the flesh.
Fish spatulas have thin, flexible edges that slip between the skin and pan surface. Their slotted design lets oil drain away as you lift and flip.
You’ll need paper towels nearby for draining the finished fish. Some cooks also use tongs to steady the fillet while using the spatula, though this isn’t necessary if your spatula is wide enough to support the entire piece.
Step-by-Step Guide: How to Pan Sear Salmon
 Pan-searing salmon requires proper seasoning, controlled heat, and precise timing to achieve crispy skin and tender, flaky flesh. The process centers on starting with a dry surface, cooking skin-side down first, and monitoring internal temperature to prevent overcooking.
Seasoning and Starting the Sear
Pat your salmon fillets completely dry with paper towels before seasoning. Moisture on the surface prevents browning and creates steam instead of a proper sear. Season both sides with salt and black pepper, applying slightly more salt to the skin side to help draw out additional moisture and promote crispiness.
Heat a stainless steel or non-stick skillet over medium-high heat for 2-3 minutes. Add 1 tablespoon of oil with a high smoke point, such as avocado or vegetable oil. The pan must be hot enough that the oil shimmers but doesn’t smoke. You can test readiness by flicking a drop of water into the pan—it should sizzle immediately.
Place the salmon skin-side down in the pan, laying it away from you to avoid oil splatter. Press down gently but firmly on the fillet with a spatula for 30 seconds. This keeps the skin flat against the cooking surface and prevents curling.
Cooking Skin-Side Down
Leave the salmon undisturbed for 4-5 minutes while it cooks skin-side down. The fish will naturally release from the pan when ready to flip. You’ll see the flesh change from translucent to opaque as it cooks, with this color change moving up from the bottom. The salmon should be approximately 70-80% cooked through before flipping.
Watch for visual cues during cooking. The edges of the salmon will turn opaque white or pink, and you can gently lift a corner to check if the skin has turned golden brown and crispy. If the skin sticks when you try to peek, give it another 30-60 seconds.
Reduce heat to medium if you notice the skin browning too quickly or if the oil begins to smoke. The goal is gradual heat penetration that crisps the skin without burning it.
Timing and Flipping Techniques
Slide a thin metal spatula under the salmon fillet once the skin releases easily. Flip the salmon in one smooth motion to avoid breaking the fillet. Cook for an additional 1-2 minutes on the flesh side, depending on thickness. A 1-inch thick fillet needs about 1-2 minutes, while thicker cuts may need up to 3 minutes.
Add 1 tablespoon of butter to the pan after flipping, along with aromatics like minced garlic and fresh herbs if desired. Tilt the pan and use a spoon to baste the melted butter over the top of the salmon. This adds flavor and helps cook the surface evenly.
Total cooking time for pan-seared salmon typically ranges from 6-8 minutes for a standard 6-ounce fillet. Thicker portions require longer cooking times, while thinner pieces cook faster.
Testing for Doneness and Flaky Salmon
Insert an instant-read thermometer into the thickest part of the salmon to check doneness. The FDA recommends 145°F for fully cooked salmon, but many prefer it at 125-130°F for a slightly translucent center that yields more moisture. The fish will continue cooking from residual heat after you remove it from the pan.
Test texture by gently pressing the top of the fillet with your finger or the back of a fork. Properly cooked salmon feels firm but still gives slightly under pressure. Overcooked salmon becomes dry and tough, while undercooked fish feels mushy.
Look for visual indicators of flaky salmon. The flesh should separate into distinct layers when you insert a fork and twist gently. The color should be uniform throughout, with no raw, jelly-like areas remaining in the center. Remove the salmon from heat as soon as it reaches your desired doneness to prevent overcooking.
Sauces, Variations, and Flavor Combinations
 Pan seared salmon pairs well with butter-based sauces, glazes, and dry rubs that complement its rich flavor. The three main approaches include traditional lemon-butter preparations, sweet-savory glazes like seasoned garlic, and herb-forward seasonings.
Classic Lemon Garlic Butter Sauce
You create this sauce by melting butter in the same pan used for searing your salmon. Add minced garlic and cook for 30 seconds until fragrant, then stir in fresh lemon juice.
The acid from lemon cuts through the richness of both salmon and butter. You need about 2 tablespoons of butter per fillet, along with 1-2 cloves of minced garlic and juice from half a lemon.
For best results, spoon the warm sauce over your salmon immediately after cooking. You can add fresh herbs like parsley or dill to the butter sauce for additional flavor depth. The sauce should be glossy and coat the back of a spoon.
Honey Garlic Salmon and Other Popular Recipes
Honey garlic salmon uses a glaze made from equal parts honey and soy sauce, creating a sweet-savory coating. You whisk together 1/4 cup honey with 1/4 cup soy sauce, then add minced garlic and grated ginger.
Pour the glaze over your salmon during the last 3-4 minutes of cooking. The sugars caramelize on the surface while the sauce reduces to a sticky consistency.
Other popular variations include:
- Maple glazed – maple syrup, soy sauce, and ginger
- Cajun spiced – paprika, garlic powder, cayenne, and black pepper
- Dijon herb crusted – mustard coating topped with panko and fresh herbs
These salmon recipes work well for weeknight meals since they take under 20 minutes total.
Creative Seasonings and Herb Butter
You can transform basic pan seared salmon with compound butters made from softened butter mixed with herbs. Combine 4 tablespoons room-temperature butter with 2 tablespoons chopped fresh herbs like parsley, dill, and chives.
Season your salmon with salt and pepper before searing, then top with a slice of herb butter while the fish is still hot. The butter melts over the surface and creates its own sauce.
For dry seasonings, you need about 1 tablespoon of spice mixture per fillet. Common combinations include Italian herbs (basil, oregano, thyme), Mediterranean (za’atar, sumac), or Asian-inspired (sesame seeds, five-spice powder). Apply seasonings before cooking to form a flavorful crust during the searing process.
Serving Suggestions and Pairings
 Pan-seared salmon pairs well with vegetables, fresh salads, and grain-based sides that complement its rich, buttery texture. The key is balancing the fish’s natural oils with lighter preparations or adding substance through starches.
Vegetable Sides for Salmon
Roasted asparagus stands out as a classic pairing because its earthy flavor and slight char match the crispy salmon skin. Toss asparagus spears with olive oil, salt, and pepper, then roast at 425°F for 12-15 minutes until the tips turn golden.
Green beans work equally well when quickly sautéed with garlic and lemon zest. Brussels sprouts offer a heartier option, especially when halved and pan-roasted until caramelized.
Broccoli florets roasted until crispy provide a nutritious accompaniment that doesn’t overpower the fish. For a lighter touch, try sautéed spinach with garlic or grilled zucchini slices brushed with herbs.
Salads and Light Pairings
A kale caesar salad provides the perfect contrast to pan-seared salmon’s richness. The crisp kale leaves hold up well against creamy dressing, while parmesan adds a salty note that enhances the fish’s flavor.
Arugula salad with lemon vinaigrette offers a peppery bite that cuts through the salmon’s fattiness. Mixed greens with cucumber, cherry tomatoes, and a light citrus dressing create a refreshing counterpoint without competing for attention.
For a more substantial option, consider a Mediterranean salad with olives, feta, and red onion. The tangy elements brighten each bite of salmon.
Starches and Grains
Rice pilaf brings texture and mild flavor that absorbs any pan juices from the salmon. Cook it with aromatics like onion and garlic, then fold in toasted almonds or dried cranberries for added interest.
Quinoa seasoned with herbs and lemon provides protein and a nutty taste that complements the fish. Creamy orzo pasta offers comfort without heaviness, particularly when finished with butter and parmesan.
Roasted potatoes or sweet potato wedges add heartiness to the plate. Mashed cauliflower serves as a lower-carb alternative that still provides the creamy texture many prefer with salmon.
Storing, Reheating, and Meal Prep Tips
 Properly stored pan-seared salmon stays fresh for 3-4 days in the refrigerator, while gentle reheating methods preserve its texture and moisture. You can also freeze cooked salmon for 2-3 months or prep components ahead for quick weeknight meals.
Storing Leftover Salmon
Transfer your cooled salmon to an airtight container within 2 hours of cooking. Glass containers work best because they don’t absorb odors and seal tightly to prevent air exposure.
Keep the salmon in the coldest part of your refrigerator, typically the back of the bottom shelf. The temperature should stay at or below 40°F to slow bacterial growth.
Use refrigerated salmon within 3-4 days for best quality and safety. Check for any off odors or color changes before eating, and discard the fish if you notice either.
Store any sauce or dressing separately from the salmon. This prevents the fish from becoming soggy and helps maintain its seared crust.
Reheating Without Losing Quality
Use your oven at 275°F for the best results. Place the salmon on a baking sheet and heat for 10-15 minutes until warmed through but not dried out.
The microwave works for quick reheating if you use 50% power. Heat in 30-second intervals and check frequently to avoid overcooking. Stop when the salmon feels warm to the touch in the center.
Never reheat salmon at high temperatures. High heat turns the fish dry and rubbery quickly. You want to gently warm it, not cook it again.
Add a small pat of butter or drizzle of olive oil before reheating. This extra fat helps keep the salmon moist during the warming process.
Freezing and Make-Ahead Ideas
Cool salmon completely before freezing it in airtight containers or freezer bags. Remove as much air as possible to prevent freezer burn. Label containers with the date and use within 2-3 months.
Thaw frozen salmon overnight in the refrigerator, never at room temperature. This gradual thawing keeps the fish safe and maintains better texture.
For meal prep, slightly undercook your salmon during the initial searing. The fish will finish cooking when you reheat it later, preventing the dry, overcooked texture that often happens with reheated seafood.
Portion your salmon into 4-6 ounce servings before cooking. This makes it easier to grab individual portions throughout the week and ensures even reheating.