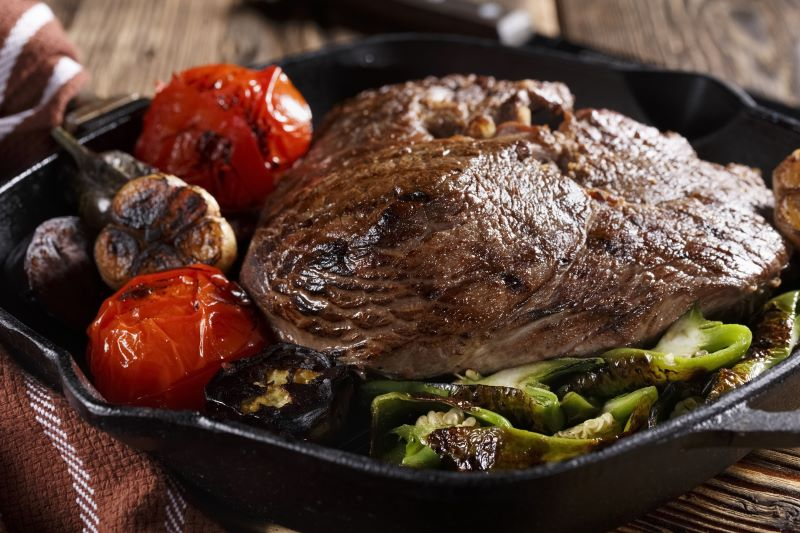


Pan searing a steak creates a flavorful crust while keeping the inside tender and juicy.
For a 1-inch thick steak, sear for 3-4 minutes per side over high heat to achieve medium-rare doneness.
Thicker cuts require more time, while thinner steaks need less.
Getting the timing right makes the difference between a perfectly cooked steak and one that’s overdone or undercooked. The exact duration depends on your steak’s thickness, your pan’s temperature, and how done you want the meat. Once you understand these factors, you can adjust your cooking time to get consistent results every time.
This guide walks you through everything you need to know about pan searing steaks. You’ll learn what affects cooking time, which tools work best, and how to execute the technique from start to finish. You’ll also find specific timing recommendations for different cuts and thickness levels.
Understanding How Long to Pan Sear Steaks
 Cooking time for pan-searing steaks depends on three main factors: the thickness of the meat, your preferred level of doneness, and the specific cut you’re cooking. A 1-inch thick steak requires 2-3 minutes per side for rare and up to 6-7 minutes per side for well done.
Typical Searing Times by Steak Thickness
Steak thickness determines your base cooking time more than any other variable. A 1-inch thick steak needs approximately 2-4 minutes per side over high heat to reach medium-rare. When you move to a 1.5-inch thick cut, add 1-2 minutes per side to achieve the same doneness level.
Thinner steaks under 3/4 inch cook in just 1-2 minutes per side for rare doneness. Thicker cuts at 2 inches require 5-6 minutes per side for medium-rare results. Always measure your steak at its thickest point before cooking to determine accurate timing.
Your pan must reach proper temperature before adding the meat. A properly heated pan creates the perfect sear without extending cooking time unnecessarily.
Impact of Desired Doneness on Timing
Each doneness level requires specific internal temperatures and corresponding cook times. For a 1-inch steak, rare needs 2-3 minutes per side to reach 125°F internally. Medium-rare steak takes 3-4 minutes per side to hit 135°F.
Medium doneness requires 4-5 minutes per side for 145°F, while medium-well needs 5-6 minutes per side to reach 150°F. Well-done steak demands 6-7 minutes per side to achieve 160°F or higher. Remove your steak 5 degrees before target temperature to account for carryover cooking, which continues raising internal temperature during the resting period.
Use an instant-read thermometer to verify doneness accurately rather than relying solely on time estimates.
Adjusting for Cut-Specific Cooking Times
Different cuts contain varying fat content and muscle structure that affect how heat penetrates the meat. Ribeye steaks cook slightly faster due to high marbling, which conducts heat efficiently through the meat. Filet mignon requires careful attention because its uniform thickness and lean composition make it prone to overcooking.
Strip steaks need standard timing for their thickness, while sirloin may need 30-60 seconds less per side due to its density. Flank and skirt steaks are thinner cuts that need only 2-3 minutes total cooking time over very high heat. When learning how to pan sear these cuts, start checking doneness 1 minute before the expected finish time to prevent overcooking.
Key Factors That Affect Searing Time
 The time needed to sear a steak depends on your pan’s material and temperature distribution, how cold or warm your steak is when it hits the pan, and the type of oil you use.
Pan Type and Heat Distribution
Cast iron pans require 10-15 minutes of preheating because they heat slowly but retain heat exceptionally well. Stainless steel and copper pans heat faster but may create hot spots that cause uneven browning.
A pan heated to 450°F will sear a 1-inch steak in 3-3.5 minutes per side for medium rare. Lower temperatures extend cooking time and risk steaming instead of achieving the Maillard reaction, which creates the brown crust on meat. You can measure pan temperature with an infrared thermometer to calculate accurate searing times.
Thicker pans distribute heat more evenly across the steak’s surface. Thin pans lose temperature quickly when you add cold meat, which slows crust formation and increases total cooking time.
Steak Temperature Before Cooking
Cold steaks straight from the refrigerator take 30-45 seconds longer per side to reach the same internal temperature as room-temperature meat. This temperature difference matters more for thick cuts over 1.5 inches.
Room temperature steaks (about 65-70°F) cook more evenly from edge to center. The exterior won’t overcook while waiting for the interior to warm up, giving you a juicy steak with less gray band under the crust.
Steaks under 1 inch thick benefit from staying cold until searing begins. The cold interior prevents overcooking during the brief high-heat exposure needed for thin cuts.
Role of Oil and Its Smoke Point
High smoke point oil prevents burning and bitter flavors during the searing process. Avocado oil handles temperatures up to 520°F, while vegetable oil works at 400-450°F.
You only need a light coating brushed on the steak or pan. Excess oil pools in the pan and fries rather than sears the meat, interfering with proper searing technique. Butter burns at searing temperatures, so add it only during the final minute for flavor.
Oil creates immediate contact between the pan surface and steak, eliminating air pockets that slow heat transfer. This direct contact speeds up searing time by 15-30 seconds per side compared to a dry pan.
Essential Equipment for Pan Searing Steaks
 The right equipment makes the difference between a mediocre steak and a restaurant-quality result. A proper skillet, accurate thermometer, and quality tongs form the foundation of successful pan searing.
Choosing the Right Skillet
Cast iron skillets are the top choice for pan searing steaks because they retain heat exceptionally well and create consistent browning. These pans reach high temperatures and maintain them even when you add cold meat to the surface. Heavy-bottomed stainless steel pans offer similar heat retention and work well if you don’t own cast iron.
Your skillet needs to be large enough to fit your steaks without touching. When steaks crowd the pan, they steam instead of sear because moisture cannot escape properly. A 12-inch skillet accommodates two steaks comfortably.
Season cast iron pans before use to prevent sticking. Stainless steel requires more oil but develops better fond (the browned bits on the pan bottom) for making sauces.
If you want one skillet to do just about everything in the kitchen, the Lodge Seasoned Cast Iron Skillet is a timeless choice. Made from heavy‑duty cast iron and pre‑seasoned with natural vegetable oil, it’s PFAS‑free and non‑toxic, so you’re cooking on metal and oil—not chemical coatings. Its thick walls and base absorb and hold heat exceptionally well, creating a consistent hot surface that’s perfect for getting a golden, flavour‑packed sear on steaks and other proteins.
Once hot, the skillet stays hot even when you add cold meat, helping develop a rich crust right on your stovetop before finishing in the oven or on the grill. With proper care it can last generations, becoming more naturally non‑stick the more you use it—a key reason chefs and home cooks alike swear by it for searing, frying, baking, and more.
Using an Instant-Read Thermometer
An instant-read thermometer removes all guesswork from cooking steaks to your preferred doneness. Insert the probe into the thickest part of the steak horizontally to get an accurate reading in 2-3 seconds. Digital meat thermometers provide readings between 125°F for rare and 160°F for well done.
Check the temperature after flipping the steak and again when you think it’s close to done. Remove steaks from heat about 5°F below your target temperature because they continue cooking during the resting period. This carryover cooking effect raises the internal temperature by several degrees.
This Alpha Grillers Digital Meat Thermometer is a fast, accurate instant‑read thermometer that takes the guesswork out of grilling, roasting, and smoking. Its clear, easy‑to‑read display and quick response make checking internal temperatures simple—whether you’re cooking steak, chicken, or burgers.
Compact and reliable, it’s a great kitchen and grilling tool that also makes a thoughtful gift for dads, moms, and anyone who loves to cook. Perfect for achieving perfectly cooked meat every time.
Importance of Tongs and Other Tools
Long-handled metal tongs give you control when flipping steaks without piercing the meat and releasing juices. Spring-loaded tongs with scalloped edges grip securely and keep your hands safe from hot oil splatter. Avoid forks or other sharp utensils that puncture the steak’s surface.
You also need paper towels for patting steaks dry before cooking. Moisture on the surface prevents proper browning and creates steam. Keep a timer nearby to track cooking duration on each side accurately.
These 17‑inch extra‑long stainless steel grill tongs are heat‑resistant up to 600 °F, making them perfect for safely flipping steaks on the grill or in a hot pan. The long reach keeps your hands away from heat while giving you solid grip and control over thick cuts of meat.
With a sturdy locking mechanism for easy storage and durable metal construction, they’re a must‑have tool for cooking, grilling, and outdoor barbecues—and especially handy when searing and turning steak without piercing the meat.
Step-by-Step Technique for Pan Searing Steak Perfectly
 The process of pan-searing steak requires precise preparation, proper heat management, and careful timing to develop a caramelized crust while maintaining a juicy interior. Each step builds on the previous one to create the ideal texture and flavor.
Preparing and Seasoning the Steak
Remove your steak from the refrigerator 30 minutes before cooking to bring it to room temperature. This ensures even heat distribution throughout the meat during the searing process.
Pat the steak completely dry with paper towels on all surfaces. Moisture prevents proper browning and creates steam instead of the desired crust.
Season both sides generously with salt and pepper immediately before cooking. Salt draws out proteins that create the brown crust during searing, while early seasoning allows the salt to penetrate the meat’s surface.
For best results, use about 1 teaspoon of kosher salt per pound of steak. Add freshly ground black pepper to taste, or include garlic powder and other dry spices if desired.
Proper Preheating and Oil Application
Place your heavy-bottomed skillet or cast iron pan over medium-high heat for 3-5 minutes. The pan must reach the proper temperature before adding oil or steak.
Test the pan temperature by flicking a few drops of water onto the surface—they should evaporate immediately. Add 1-2 tablespoons of high smoke-point oil such as canola, avocado, or grapeseed oil once the pan is hot.
Let the oil heat until it shimmers and just begins to smoke slightly. This typically takes 30-60 seconds and indicates the oil has reached 400-450°F.
Tilt the pan to coat the entire cooking surface evenly with oil. A properly preheated pan with hot oil creates the foundation for an excellent sear.
Searing and Timing Each Side
Place the steak in the pan away from you to avoid oil splatter. Do not move, press, or disturb the steak during the initial sear.
For a 1-inch thick steak, sear for 2-3 minutes for rare, 3-4 minutes for medium-rare, or 4-5 minutes for medium. Thicker cuts require approximately 1 additional minute per side for each extra half-inch of thickness.
Watch for a golden-brown crust to form around the bottom edge of the steak. The meat will naturally release from the pan when properly seared—if it sticks, it needs more time.
Avoid overcrowding the pan with multiple steaks, as this lowers the cooking temperature and causes steaming rather than searing.
Flipping and Finishing the Steak
Use tongs to flip the steak once after the first side develops a deep brown crust. Never use a fork, as piercing the meat releases valuable juices.
Cook the second side for the same duration as the first side, adjusting based on your desired internal temperature: 125°F for rare, 135°F for medium-rare, or 145°F for medium. Insert an instant-read thermometer into the thickest part of the steak to check doneness accurately.
Add butter, crushed garlic cloves, and fresh herbs like thyme or rosemary during the final minute of cooking. Tilt the pan and use a spoon to baste the steak with the melted butter mixture.
Remove the steak when it reaches 5°F below your target temperature to account for carryover cooking. Let it rest on a cutting board for 5-10 minutes before slicing to allow juices to redistribute throughout the meat.
Popular Steak Cuts and Their Searing Recommendations
 Different cuts require specific timing and techniques based on their thickness, fat content, and muscle structure. Ribeye needs 3-4 minutes per side for medium-rare, while filet mignon cooks faster at 2-3 minutes due to its lean composition.
Ribeye Steak Best Practices
Ribeye contains rich marbling throughout the meat, which makes it one of the most forgiving cuts for pan searing. The internal fat melts during cooking and keeps the steak moist even if you slightly overcook it.
For a 1-inch ribeye, sear for 3-4 minutes per side over medium-high heat to reach medium-rare (135°F). Thicker cuts of 1.5 inches need 4-5 minutes per side. The fat cap on the edge should be rendered by holding the steak upright with tongs for 30-60 seconds.
Use a cast iron or heavy-bottomed stainless steel pan (ideally cast iron) to maintain consistent heat. Pat the ribeye completely dry before seasoning to ensure proper crust formation. The high fat content produces smoke, so turn on your kitchen vent before cooking.
Filet Mignon Pan Searing Tips
Filet mignon has minimal fat and a buttery texture that requires careful attention to avoid drying out. This cut cooks faster than other steaks because of its lean composition and uniform thickness.
Sear 1-inch filet mignon for 2-3 minutes per side for medium-rare (130-135°F). Add butter, garlic, and fresh thyme to the pan during the last minute and baste continuously. This technique adds moisture and compensates for the lack of natural fat.
Let filet mignon sit at room temperature for 30 minutes before cooking to promote even heat distribution. Season generously with salt and cracked black pepper. Use tongs instead of a fork to flip the steak to prevent juice loss.
Pan Searing Top Sirloin
Top sirloin offers a balance between tenderness and robust beef flavor at a lower price point than premium cuts. The muscle fibers are slightly tougher, so proper searing technique matters more.
Cook 1-inch top sirloin for 4-5 minutes per side for medium doneness (145°F). This cut benefits from a two-zone approach: sear at high heat for 2 minutes per side, then reduce to medium heat to finish cooking. Score the fat cap in a crosshatch pattern before searing to prevent curling.
Choose top sirloin steaks with visible marbling for better results. Avoid pressing down on the meat while it cooks, as this squeezes out moisture and creates a tougher texture.
Guidance for Other Common Steak Cuts
New York strip steaks need 3-4 minutes per side for medium-rare when cut to 1 inch thick. The strip has a firmer texture than ribeye but more fat than sirloin, requiring moderate heat to render the fat strip along one edge.
T-bone and porterhouse combine two different muscles—tenderloin and strip—which cook at different rates. Position the tenderloin side farther from the heat source or sear for 4-5 minutes on the strip side and 3-4 minutes on the tenderloin side. Flank steak and skirt steak are thin cuts that need only 2-3 minutes per side over high heat, and you must slice them against the grain after resting.
After the Sear: Resting, Slicing, and Serving
 Once your steak comes off the heat, proper resting allows juices to redistribute throughout the meat while carryover cooking continues to raise internal temperature. The way you slice and plate the steak, along with complementary sides, determines the final eating experience.
Importance of Resting and Carryover Cooking
Let your steak rest for 5 to 10 minutes after removing it from the pan. During this time, the internal temperature continues to rise by 3 to 5 degrees Fahrenheit due to carryover cooking.
The heat retained in the outer layers of meat gradually moves toward the center. This means you should pull your steak from the pan when it reads 5 degrees below your target temperature.
Resting allows muscle fibers to relax and reabsorb juices that moved toward the surface during cooking. If you cut into a steak immediately, these juices spill onto the cutting board instead of staying in the meat. Place the steak on a wire rack or cutting board without covering it, as foil traps steam and softens the crust you worked to create.
Carving and Plating for Maximum Juiciness
Identify the grain of the meat by looking for the direction of the muscle fibers running through the steak. Cut perpendicular to these lines using a sharp knife.
Slicing against the grain shortens the muscle fibers, making each bite more tender. Use smooth, confident strokes rather than sawing motions to keep the meat intact. For strip steaks and ribeyes, slice pieces between 1/4 and 1/2 inch thick.
Arrange slices slightly overlapped on a warm plate to maintain temperature. The resting period should have produced a small pool of juices on your cutting board—spoon these over the sliced meat for added flavor and moisture.
Classic Sides and Pan Sauces for Steak
Use the browned bits left in your pan to build a quick pan sauce. Add 1/4 cup of wine, broth, or cognac to the hot pan and scrape the bottom with a wooden spoon. Reduce the liquid by half, then swirl in 2 tablespoons of cold butter.
Creamed spinach pairs naturally with steak because its richness complements the meat without competing for attention. The traditional steakhouse combination works due to contrasting textures and temperatures.
Other reliable sides include roasted potatoes, grilled asparagus, or a simple green salad. Keep sides straightforward so the steak remains the focus of the plate.