
 When grilling with wood, you should let the wood burn for 20 to 30 minutes until it breaks down into glowing hot coals with minimal flames and produces only thin, clear smoke.
Cooking over wood too soon results in bitter, sooty flavors that ruin your food. Getting the timing right makes the difference between a meal with clean, smoky flavor and one that tastes like a campfire accident.
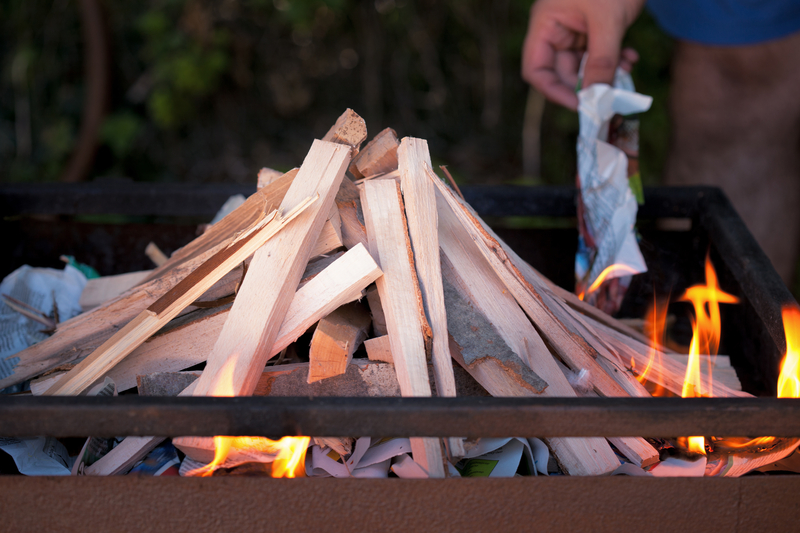
Most people throw their steaks on as soon as they see flames, but that’s exactly when you shouldn’t be cooking. Wood goes through stages as it burns, starting with thick smoke and large flames before settling into the ideal cooking conditions. Understanding these stages helps you know when your fire is truly ready.
This guide walks you through the science behind wood combustion, how to prepare your fire correctly, and what signs tell you it’s time to start grilling. You’ll learn how wood compares to other fuels, how to maintain consistent heat, and which mistakes send beginners back to the kitchen with charred, bitter food.
Why Timing Wood Burn Is Crucial for Grilling
 Wood needs 30 to 45 minutes of burning before you place food on the grill because fresh wood releases harsh chemicals and bitter smoke. The initial burn period transforms raw wood into clean-burning coals that produce the right heat and smoke for safe, flavorful cooking.
Flavor Development and Smoke Quality
The burn-in process changes the type of smoke your wood produces. Fresh wood creates thick, white smoke filled with moisture and unburned particles that make food taste bitter and acrid.
As wood burns longer, the smoke shifts from white to thin blue. This blue smoke carries the compounds that give grilled food its desirable smoky taste. If you cook during the white smoke phase, your meat will absorb harsh flavors that overpower the natural taste of the food.
Different woods reach optimal smoke quality at different rates. Hardwoods like oak and hickory need the full 30 to 45 minutes to develop clean smoke. Fruitwoods like apple or cherry may be ready in 25 to 35 minutes because they burn differently than denser hardwoods.
The temperature of your burning wood also affects flavor. Wood that hasn’t completed its initial burn produces inconsistent heat, which means some parts of your food cook faster than others.
Food Safety and Clean Cooking
Raw wood contains water, sap, and organic compounds that must burn off before the wood is safe for cooking. During the first 15 to 20 minutes of burning, wood releases these substances as steam and smoke.
Cooking over wood that hasn’t completed this burn-in process exposes your food to excess moisture and unburned materials. Your food can develop an unpleasant taste and may not reach proper cooking temperatures because wet wood burns cooler than dry, established coals.
You need the wood to reach its ember stage, when it glows orange or red beneath a layer of gray ash. This stage indicates the wood has burned through its volatile compounds and now produces steady, predictable heat.
Avoiding Harmful Residues
Incomplete wood combustion creates creosote and other tar-like substances that can coat your food. These residues form when wood burns at low temperatures without enough oxygen during the early stages of fire.
Creosote leaves a black, sticky film on meat that tastes unpleasant and contains compounds you should avoid eating. The burn-in process reduces creosote formation by bringing the wood to higher temperatures where combustion is more complete.
Properly timed wood burning also prevents soot buildup on your food. Soot appears as fine black particles when wood doesn’t burn cleanly. You’ll see less soot once the wood transitions from active flames to glowing embers with minimal visible smoke.
Key Takeaways
- Wait 30 to 45 minutes for wood to burn from thick white smoke to thin blue smoke before adding food
- The initial burn removes moisture, sap, and volatile compounds that cause bitter flavors and inconsistent heat
- Cooking too early exposes food to creosote, soot, and other residues from incomplete wood combustion
- Blue smoke and gray-ashed embers signal wood has reached the clean-burning stage for safe grilling
Optimal Time to Let Wood Burn Before Grilling

Wood needs 20 to 45 minutes to burn down to the right stage for grilling, depending on the wood type and your cooking method. The burn time varies based on whether you want direct high heat or low-and-slow smoking, and different wood species reach optimal temperatures at different rates.
Recommended Burn Duration
Hardwoods require 30 to 45 minutes to burn down to hot coals suitable for grilling. This allows flames to die down and the wood to develop a bed of glowing embers that produce steady, clean heat. Softwoods burn faster but produce inconsistent heat and excess smoke, making them poor choices for grilling.
For high-heat grilling of steaks or burgers, let wood burn for 35 to 45 minutes until you have a deep bed of red-hot coals with minimal flame. Medium-heat cooking needs 25 to 35 minutes, creating coals that glow orange rather than bright red. Low-and-slow smoking works best after 20 to 30 minutes when wood has burned down enough to produce thin, blue smoke instead of thick white smoke.
Using a chimney starter with wood chunks speeds up the process by 10 to 15 minutes compared to lighting wood directly in your grill. Wood splits smaller than 3 inches thick reach cooking temperature faster than larger logs.
Visual and Temperature Indicators
Your wood is ready when flames have died down to occasional flickers and coals glow bright orange to red underneath a light gray ash layer. Thick white smoke indicates wood is still burning too hot and will give food a bitter taste. Wait for thin, almost invisible smoke or a light blue haze before placing food on the grill.
Check your grill temperature using a grill thermometer placed at grate level. Wood coals are ready at 450°F to 550°F for high-heat searing, 350°F to 450°F for medium cooking, and 225°F to 300°F for smoking. The hand test works too—hold your palm 5 inches above the grate and count how many seconds you can keep it there before pulling away.
| Heat Level | Grill Temperature | Hand Test Time | Coal Appearance |
|---|---|---|---|
| High | 450°F–550°F | 2–4 seconds | Bright red glow |
| Medium | 350°F–450°F | 5–7 seconds | Orange glow |
| Low | 225°F–300°F | 8–10 seconds | Dull red glow |
Impact of Wood Type on Timing
Oak and hickory take 40 to 45 minutes to burn down because of their dense structure and high heat output. These hardwoods create long-lasting coals that maintain steady temperatures for extended cooking sessions. Maple and fruitwoods like cherry or apple burn slightly faster at 30 to 40 minutes but still produce reliable heat.
Mesquite burns hot and fast, reaching cooking temperature in 25 to 35 minutes. It creates intense heat ideal for quick searing but burns out faster than other hardwoods. Avoid mixing green or wet wood with seasoned wood, as moisture extends burn time by 15 to 20 minutes and creates excess smoke that affects flavor.
Seasoned wood with less than 20% moisture content burns most efficiently. Split your wood into uniform sizes between 2 and 4 inches thick for consistent burn rates across your fire bed.
Key Takeaways
- Allow hardwood to burn 30 to 45 minutes until flames die down and coals develop a light gray ash coating with an orange-red glow underneath
- Use a grill thermometer to confirm temperature reaches 450°F to 550°F for high heat, 350°F to 450°F for medium, or 225°F to 300°F for smoking
- Dense woods like oak and hickory need 40 to 45 minutes while lighter fruitwoods reach cooking temperature in 30 to 40 minutes
- Wait until thick white smoke turns to thin blue haze before grilling to avoid bitter flavors on your food
Preparing and Starting the Fire for Grilling

Building a proper fire starts with correct wood arrangement and safe lighting methods. The way you stack your wood and ignite the fire directly affects how quickly it reaches cooking temperature and how evenly it burns.
Arranging Wood and Kindling
Start with a base layer of dry kindling like small twigs, wood shavings, or newspaper crumpled loosely. Place your kindling in the center of your grill, leaving space for air to flow underneath and between pieces.
Stack seasoned firewood in a pyramid or log cabin structure around the kindling. The pyramid method works well for quick ignition because it creates natural airflow through the center. For the log cabin approach, arrange logs in alternating layers to form a square shape with the kindling inside.
Use wood pieces that are 2-4 inches in diameter for grilling. Larger pieces take too long to catch and create uneven heat. Smaller pieces burn out before you finish cooking.
Leave gaps between wood pieces rather than packing them tightly together. Air needs to circulate through the stack for efficient burning. If you’re combining wood with charcoal, place a layer of charcoal at the bottom first, then add your wood on top once the charcoal starts glowing.
Using a Chimney Starter
A chimney starter gives you consistent results when starting your fire. Fill the top chamber with charcoal or small wood pieces, then place crumpled newspaper or fire starter cubes in the bottom chamber.
Set the charcoal chimney on your grill grate or a heat-safe surface before lighting. Light the newspaper or starter cubes through the bottom vents. The design creates an updraft that pulls flames through the fuel above.
Wait 15-20 minutes until you see flames coming out the top and the charcoal or wood develops a gray ash coating. Wear heat-resistant gloves when handling the chimney starter because the metal gets extremely hot. Pour the burning contents into your grill carefully, tilting slowly to control where the coals land.
Lighting Techniques and Safety
Use natural fire starters like wood shavings, newspaper, or commercial fire starter cubes. Never use lighter fluid or gasoline on wood fires because they create dangerous flare-ups and leave chemical residues on your food.
A propane torch provides the fastest and most controlled ignition method. Point the flame at your kindling from multiple angles until it catches. Keep a fire extinguisher or water source nearby before you start.
Position your grill at least 10 feet away from your home, deck railings, or overhanging branches. Make sure the grill sits on a stable, level surface that won’t tip over. Check wind direction before lighting to keep smoke and sparks away from structures and people.
Light the fire with proper ventilation by opening all grill vents fully. This helps the fire establish quickly and reduces excess smoke during the startup phase.
Key Takeaways
- Stack wood in a pyramid or log cabin pattern with kindling at the center and 2-4 inch diameter pieces for optimal airflow and ignition
- Use a chimney starter with heat-resistant gloves for safe, consistent fire starting that takes 15-20 minutes to reach proper temperature
- Light fires with natural starters or a propane torch while keeping the grill 10 feet from structures with all vents open
- Never use lighter fluid on wood fires as it creates dangerous flare-ups and contaminates food with chemicals
- Maintain proper spacing between wood pieces to ensure adequate oxygen flow throughout the burning process
Managing Grill Heat and Burn Consistency

Controlling your grill’s heat after the wood reaches cooking temperature requires active management of airflow and consistent temperature monitoring. The vents on your grill regulate oxygen flow to the burning wood, while a thermometer helps you track temperature changes and maintain the right cooking environment.
Adjusting Airflow With Grill Vents
Your grill vents control how much oxygen reaches the burning wood. Opening the bottom vents wider increases airflow, which makes the wood burn hotter and faster. Closing them partially reduces oxygen and lowers the temperature.
The top vents work differently. They control heat and smoke flow out of the grill. Keep them at least partially open to prevent smoke buildup that can make food taste bitter.
Start with both vents halfway open when you add food. If the temperature drops below your target, open the bottom vent another quarter turn and wait 5-10 minutes before adjusting again. For lower temperatures, close the bottom vent to about one-quarter open. Small adjustments work better than large changes because the grill takes time to respond.
Monitoring Heat Levels
A grill thermometer gives you accurate temperature readings at the cooking surface. Place it at grate level, not just on the lid, since lid temperatures run 50-75 degrees higher than where your food sits.
Check the temperature every 15-20 minutes during cooking. Wood burns at different rates depending on the type, moisture content, and piece size. Temperature swings of 25 degrees are normal, but larger changes mean you need to adjust the vents or add more fuel.
Look at the wood itself for visual cues. Glowing red embers with a light coating of white ash indicate proper burning temperatures. Black, sooty wood means incomplete combustion and requires more airflow.
Maintaining Steady Cooking Temperatures
Add small amounts of burning wood from a separate fire rather than cold pieces directly to your grill. Cold wood drops the temperature and produces more smoke before it reaches proper burning temperature.
Plan to add fuel before the temperature drops. If you’re cooking at 350°F and your wood normally burns for 45 minutes, add new pieces at the 30-minute mark. This prevents temperature dips that extend cooking time.
Avoid opening the lid frequently. Each time you open it, the temperature drops 25-50 degrees and takes 10-15 minutes to recover. Use the thermometer and vents to manage heat instead of checking food visually until it’s nearly done.
Comparing Wood, Charcoal Briquettes, and Lump Charcoal
 Each fuel type burns differently and requires specific timing before you can start grilling. Lump charcoal reaches cooking temperature fastest, briquettes provide the most consistent burn, and raw wood demands the longest wait time but delivers the strongest smoke flavor.
Burn Timing Differences
Lump charcoal lights quickly and reaches grilling temperature in 10-15 minutes. The irregular chunks catch fire fast because they contain no fillers or binders.
Charcoal briquettes need 20-25 minutes to become cooking-ready. The additives and compressed shape slow down ignition, but this creates more predictable heat once they’re lit.
Raw wood requires 45-60 minutes of burning before it’s safe to cook over. You need to let wood burn down until the flames die and you see glowing embers covered with white ash. Cooking over flames creates bitter flavors and deposits soot on your food.
The charcoal burn time for briquettes typically lasts 3-4 hours at steady temperatures. Lump charcoal burns hotter but faster, usually providing 1-2 hours of high heat depending on your grill setup and airflow.
Heat Output and Control
Lump charcoal produces the highest temperatures, often reaching 900-1000°F. This makes it perfect for searing steaks or cooking pizzas quickly.
Briquettes burn at lower temperatures around 700°F but maintain steadier heat. The uniform shape and size create consistent airflow and predictable temperature control during charcoal grilling.
Wood burns hot initially but temperatures drop as it converts to coals. Managing wood fire temperatures requires experience because the heat fluctuates significantly during the burn-down period.
Temperature Comparison:
- Lump charcoal: 900-1000°F, burns fast, requires frequent monitoring
- Briquettes: 700°F, burns steady for hours, easier temperature management
- Wood: Variable, starts very hot then moderates, needs 45+ minutes to stabilize
Smoke Flavor Characteristics
Lump charcoal adds mild smoky flavor because it’s made from pure hardwood. The taste reflects the wood species used in production, whether oak, hickory, or mesquite.
Briquettes produce minimal smoke flavor. The binders and additives dilute the natural wood characteristics, sometimes adding slight chemical notes if lower-quality brands are used.
Wood delivers the strongest smoke flavor by far. Different wood types create distinct tastes—applewood adds sweetness, hickory brings bold smokiness, and cherry provides fruity notes.
The smoke is most intense during the flame stage, which is why you must wait for the clean-burning coal stage before placing food on the grill.
Key Takeaways
- Lump charcoal reaches cooking temperature in 10-15 minutes and burns hottest at 900-1000°F but requires more frequent refueling
- Briquettes need 20-25 minutes to light but provide 3-4 hours of steady 700°F heat with easier temperature control
- Raw wood demands 45-60 minutes of burning until flames die and white ash appears, but delivers the strongest and most varied smoke flavors
- Never grill over flaming wood as it creates bitter tastes and deposits harmful soot on food
- Choose your fuel based on cooking time needs—briquettes for long cooks, lump charcoal for high-heat searing, wood for maximum smoke flavor
Preparation and Maintenance Steps Before Grilling

Getting your grill ready involves cleaning the grates, seasoning new equipment properly, and maintaining the surface after each cooking session. These steps protect your investment and ensure food doesn’t stick or pick up unwanted flavors.
Cleaning the Grill Grates
Start by removing any packaging materials, stickers, or protective coatings from your grill before the first use. Wash the grates thoroughly with warm water and dish soap to remove manufacturing oils and residues.
After washing, dry the grates completely with a clean towel to prevent water spots. For existing grills, use a wire brush or grill scraper to remove built-up residue before heating.
Check the burners and heat deflectors for debris or blockages. Clear any spider webs or dust from gas burner ports with a thin wire or pipe cleaner.
Seasoning Process for New Grills
Burning off a new grill removes factory coatings and creates a protective layer on the grates. Heat your new grill to 400-500°F with the lid closed for 30 minutes to one hour.
For gas grills, turn all burners to high and let them run through this initial burn. Charcoal grills require a full chimney of lit charcoal spread evenly across the bottom.
After burning off, let the grill cool slightly and apply a thin layer of high-smoke-point oil to the grates. Use vegetable oil, canola oil, or grapeseed oil applied with a paper towel held by tongs.
Heat the oiled grates again at medium-high for 15-20 minutes until the oil darkens and bonds to the metal. This seasoning process creates a natural non-stick surface that improves with each use.
Maintaining Your Grill After Use
Clean your grates while they’re still warm after each cooking session. Brush away food particles with a grill brush, moving in the direction of the grates rather than across them.
Apply a light coating of oil to the grates after cleaning to prevent rust and maintain the seasoned surface. This takes less than a minute but protects the metal between uses.
Empty the drip tray or ash catcher regularly to prevent grease fires and maintain proper airflow. Check gas connections monthly for leaks using soapy water, and inspect charcoal grills for rust or damage.
Cover your grill when not in use to shield it from weather and debris. Re-season the grates every few months if you notice food starting to stick more frequently.
Key Takeaways
- Wash new grill grates with soap and water, then dry completely before the initial burn-off at 400-500°F for 30-60 minutes
- Season grates by coating them with high-smoke-point oil and heating for 15-20 minutes to create a protective, non-stick surface
- Clean grates while warm after each use and apply a thin oil layer to prevent rust and maintain seasoning between cooking sessions
Common Mistakes and Safety Best Practices

Starting your grill too soon or using chemical accelerants creates health hazards and ruins food quality. Proper burn time and safe ignition methods protect both you and your meal.
Risks of Insufficient Burn Time
Cooking over flames instead of hot coals exposes food to incomplete combustion byproducts. When wood hasn’t burned down completely, it releases excess smoke containing harmful compounds that coat your food with an acrid, bitter taste.
Raw flames produce uneven temperatures that char the outside of meat while leaving the inside undercooked. You need at least 30-45 minutes of burn time for wood to develop the white-gray ash coating that indicates clean-burning coals. This ash layer signals the wood has reached optimal grilling temperature between 450-550°F.
Grilling too early also wastes fuel. Flames consume wood rapidly without generating sustained heat, forcing you to add more pieces throughout cooking. Coals maintain steady temperatures for 45-60 minutes, giving you consistent results without constant adjustments.
Dangers of Using Lighter Fluid
Using lighter fluid on wood creates toxic fumes that penetrate your food. Petroleum-based accelerants contain volatile organic compounds that don’t fully burn off, leaving chemical residues on grilling surfaces and in the meat itself.
The vapors from lighter fluid can cause flash fires when you add more fluid to existing embers. This common mistake sends flames several feet high and causes serious burns. Never add accelerant to lit or warm coals.
Natural fire starters made from paraffin wax, wood shavings, or vegetable oil provide safer ignition without chemical contamination. A charcoal chimney starter eliminates the need for any accelerant by using newspaper and airflow to ignite wood efficiently. These methods take slightly longer but produce clean-burning fires without petroleum residue.
Safety Precautions While Grilling
Position your grill at least 10 feet away from structures, overhanging branches, and flammable materials. Wood embers can drift up to 15 feet in wind conditions, creating fire hazards well beyond the immediate cooking area.
Wear heat-resistant gloves rated for temperatures above 500°F when adjusting wood pieces or moving hot grates. Regular oven mitts don’t provide adequate protection against the sustained heat of wood coals. Keep a fire extinguisher or bucket of sand within reach throughout the entire cooking process.
Check the wood pile after grilling ends. Coals remain hot enough to ignite for 12-24 hours after you finish cooking. Douse ashes thoroughly with water and stir to ensure no embers survive before disposal.
Never leave a wood fire unattended, even during the burn-down phase before grilling begins. Wind shifts can scatter embers or tip over unstable wood stacks.
Key Takeaways
- Wait 30-45 minutes for wood to burn down to white-gray coals before placing food on the grill to avoid bitter smoke flavors and uneven cooking
- Skip lighter fluid entirely and use natural fire starters or a chimney starter to eliminate toxic chemical residues on your food
- Keep your grill 10+ feet from structures, wear heat-resistant gloves when handling hot components, and maintain a fire extinguisher nearby
- Allow 12-24 hours for complete cooling and thoroughly douse ashes with water before disposal to prevent accidental fires